WooCommerce
This article shows you the procedure to enable PayU on your WooCommerce website.
WooCommerce is a WordPress plugin that ease the creation of an integrated online store. To let your clients pay with PayU from your website, you need to install the plugin for WooCommerce, which integrates PayU Latam as a valid payment gateway. For more information about WooCommerce, refer to their official website.
Prerequisites
- You need an active account in PayU Latam.
- Having installed WordPress 3.8 or higher.
- Having installed WooCommerce 2.0 or higher in the WordPress website.
- Having the PayU’s WooCommerce plugin downloaded and stored in an accessible location. Click here to download it.
Installation
Follow the next procedure to install the plugin on your website.
-
Log in to your WordPress site as an administrator.
-
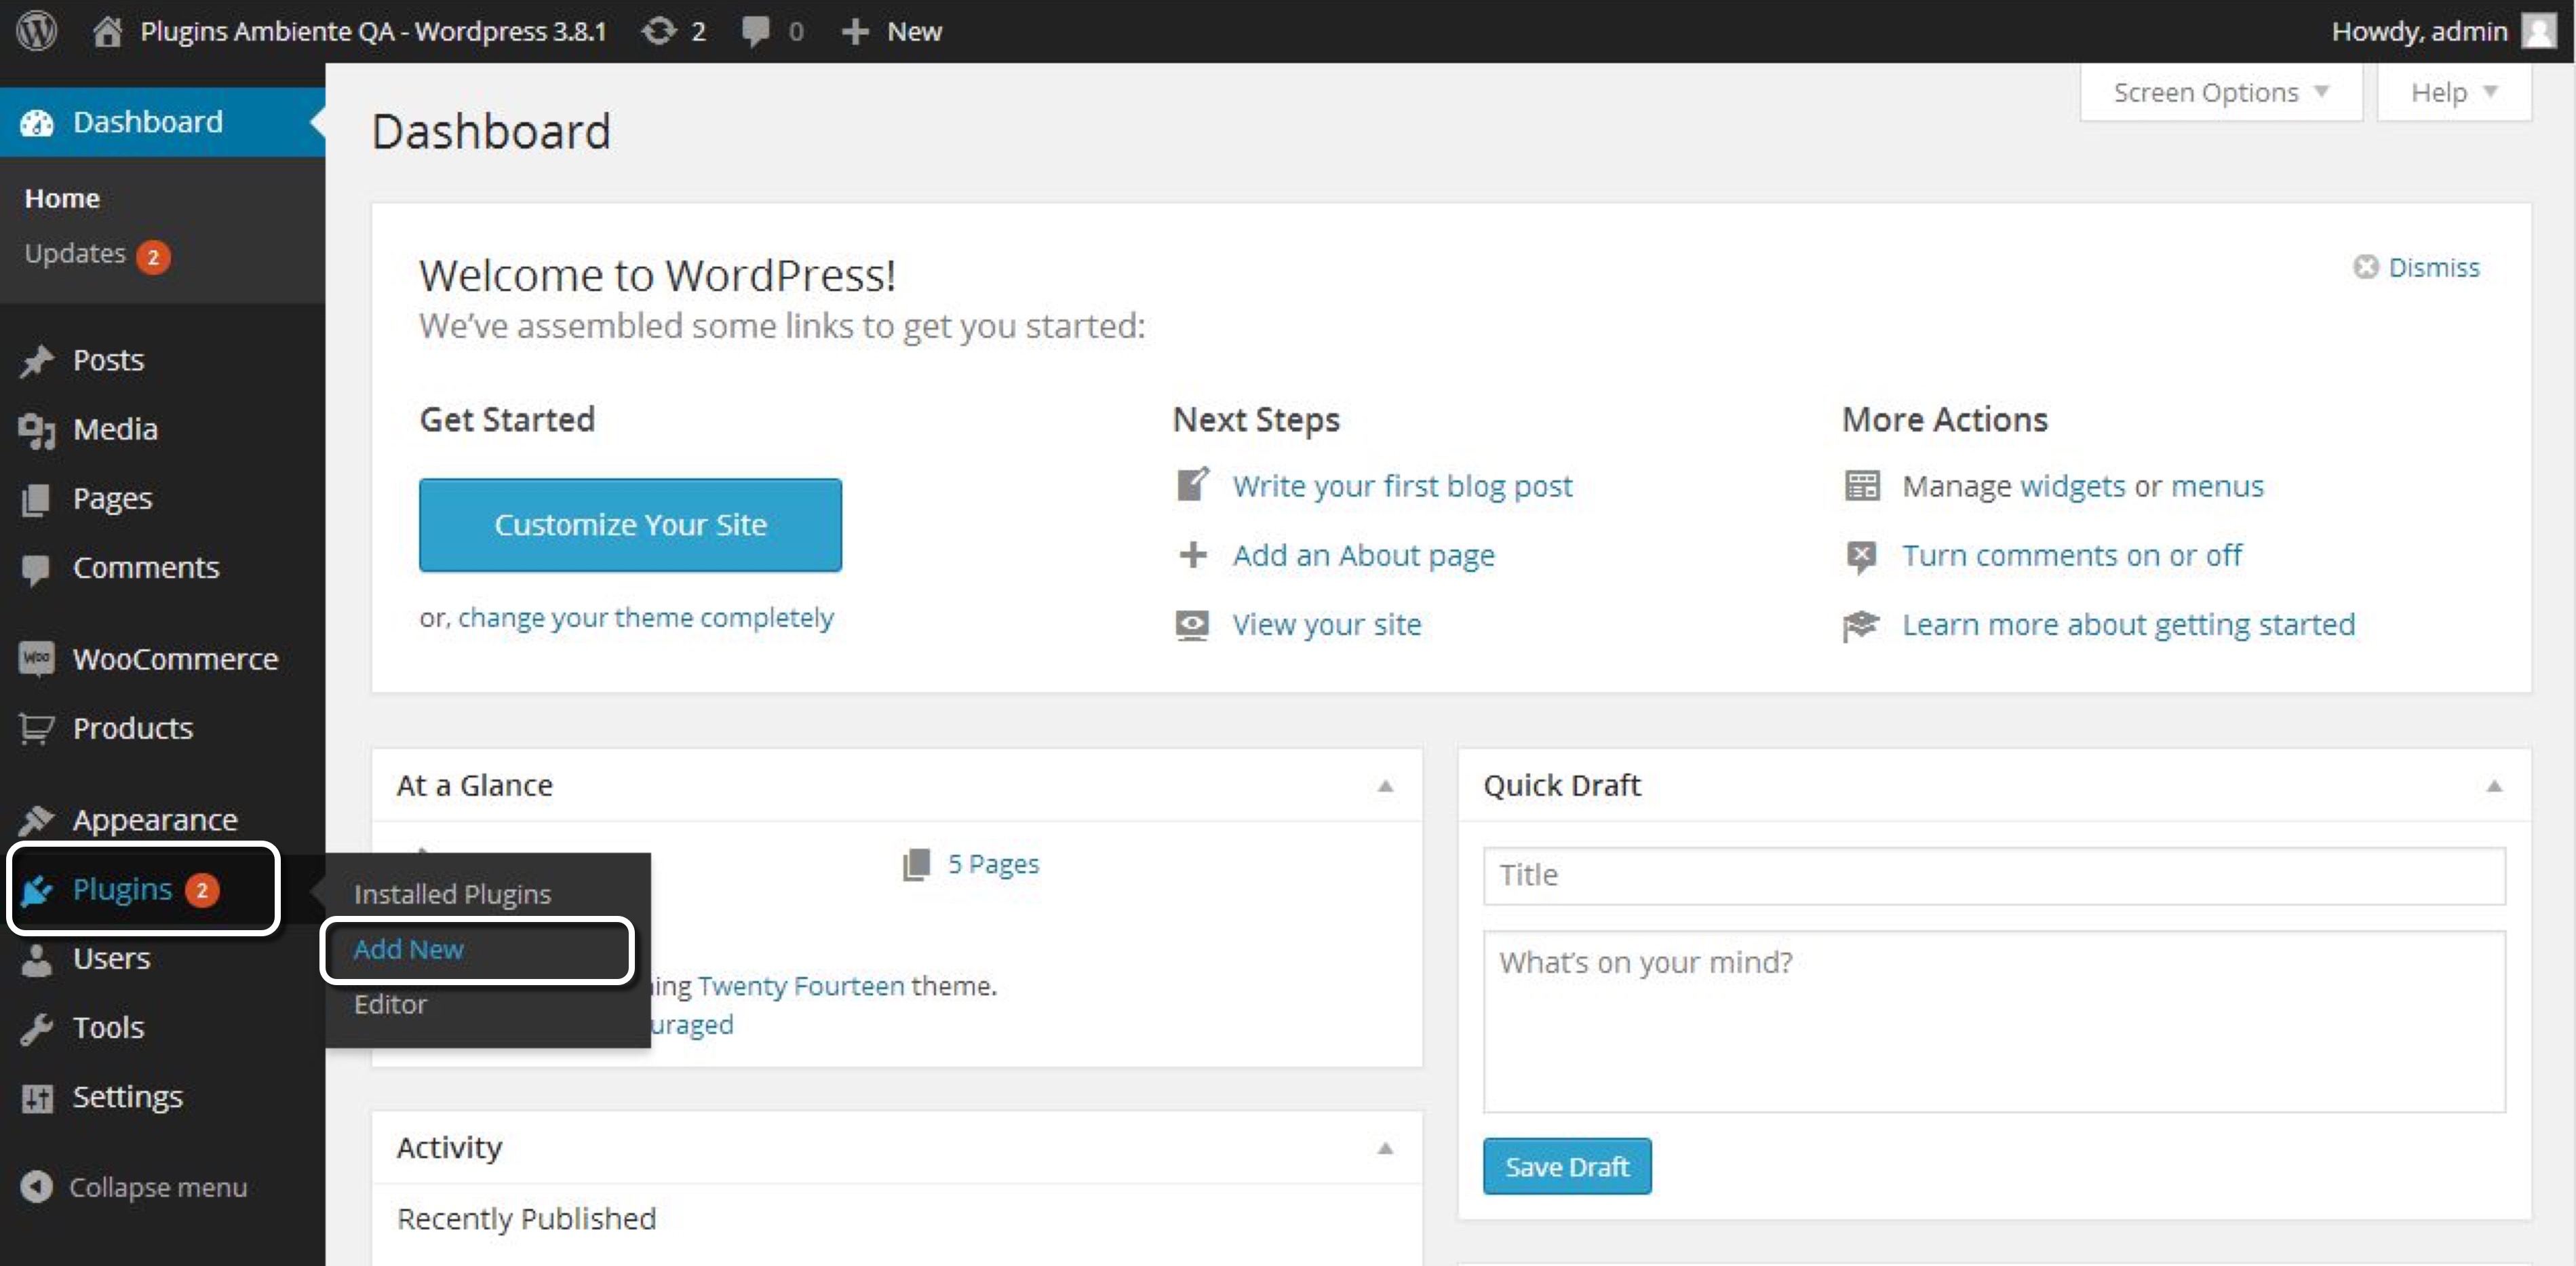
In the Dashboard, expand the Plugins menu in the left panel and click Add New.
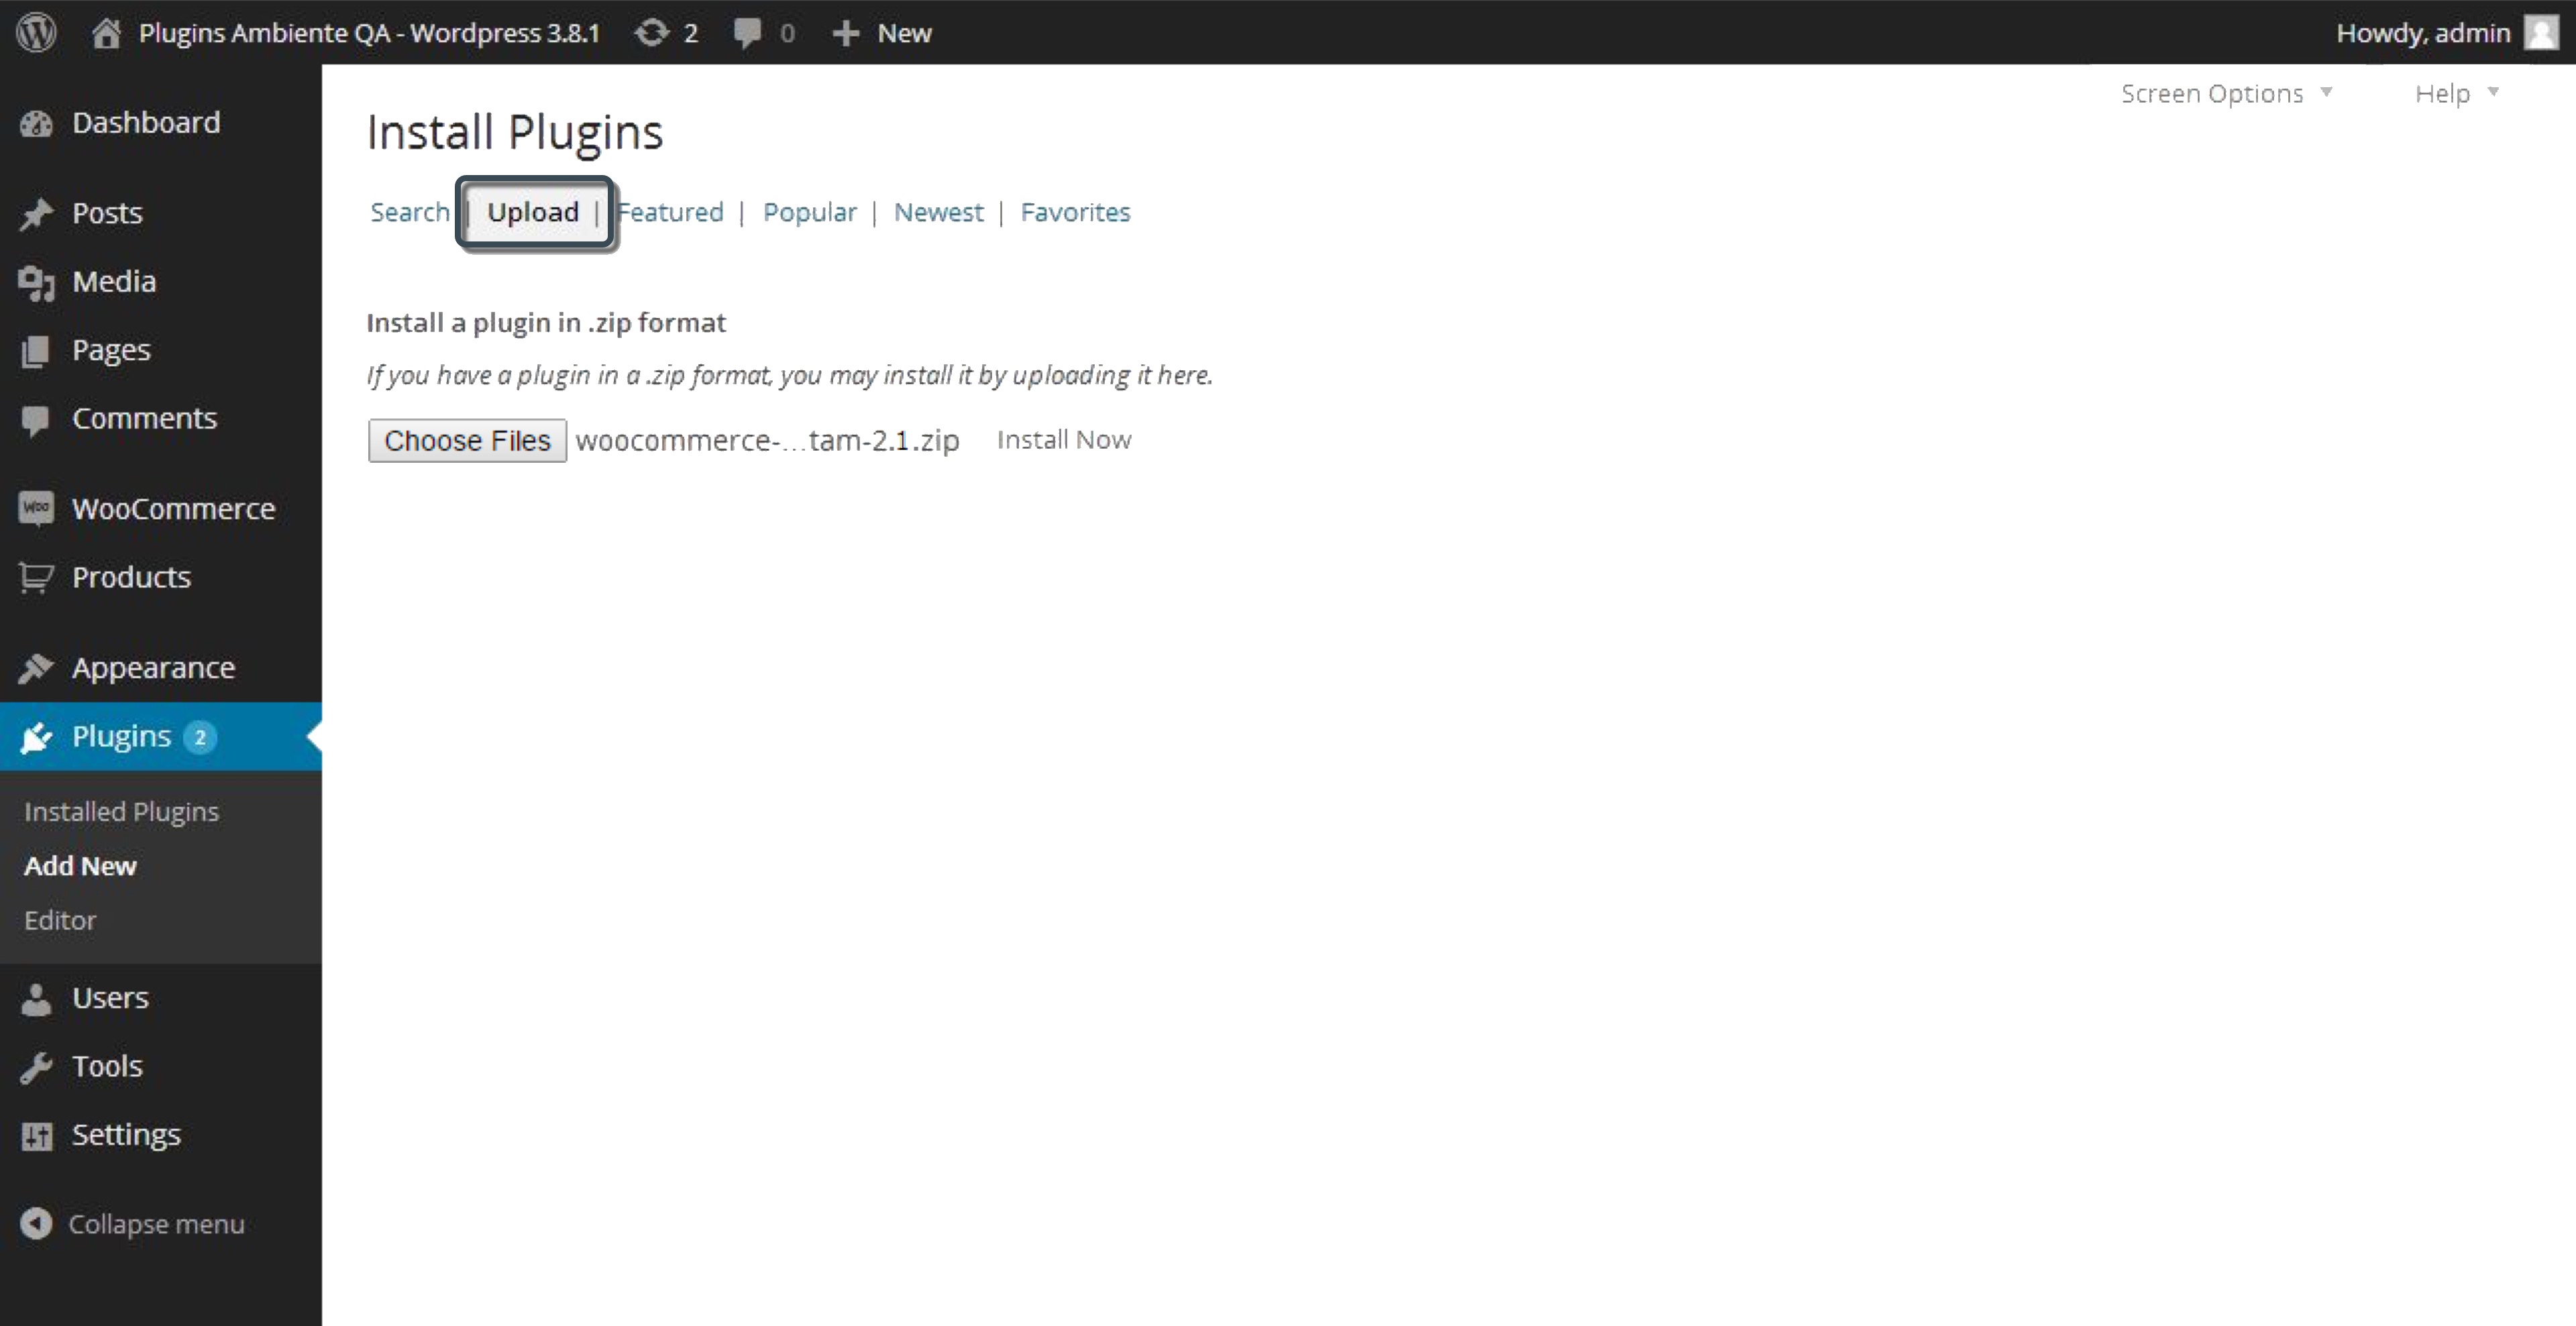
- Go to the Upload option and choose the .zip file of the WooCommerce plugin downloaded.
Then, click Install Now.
- Provide the data of the connection via FTP and click Proceed.
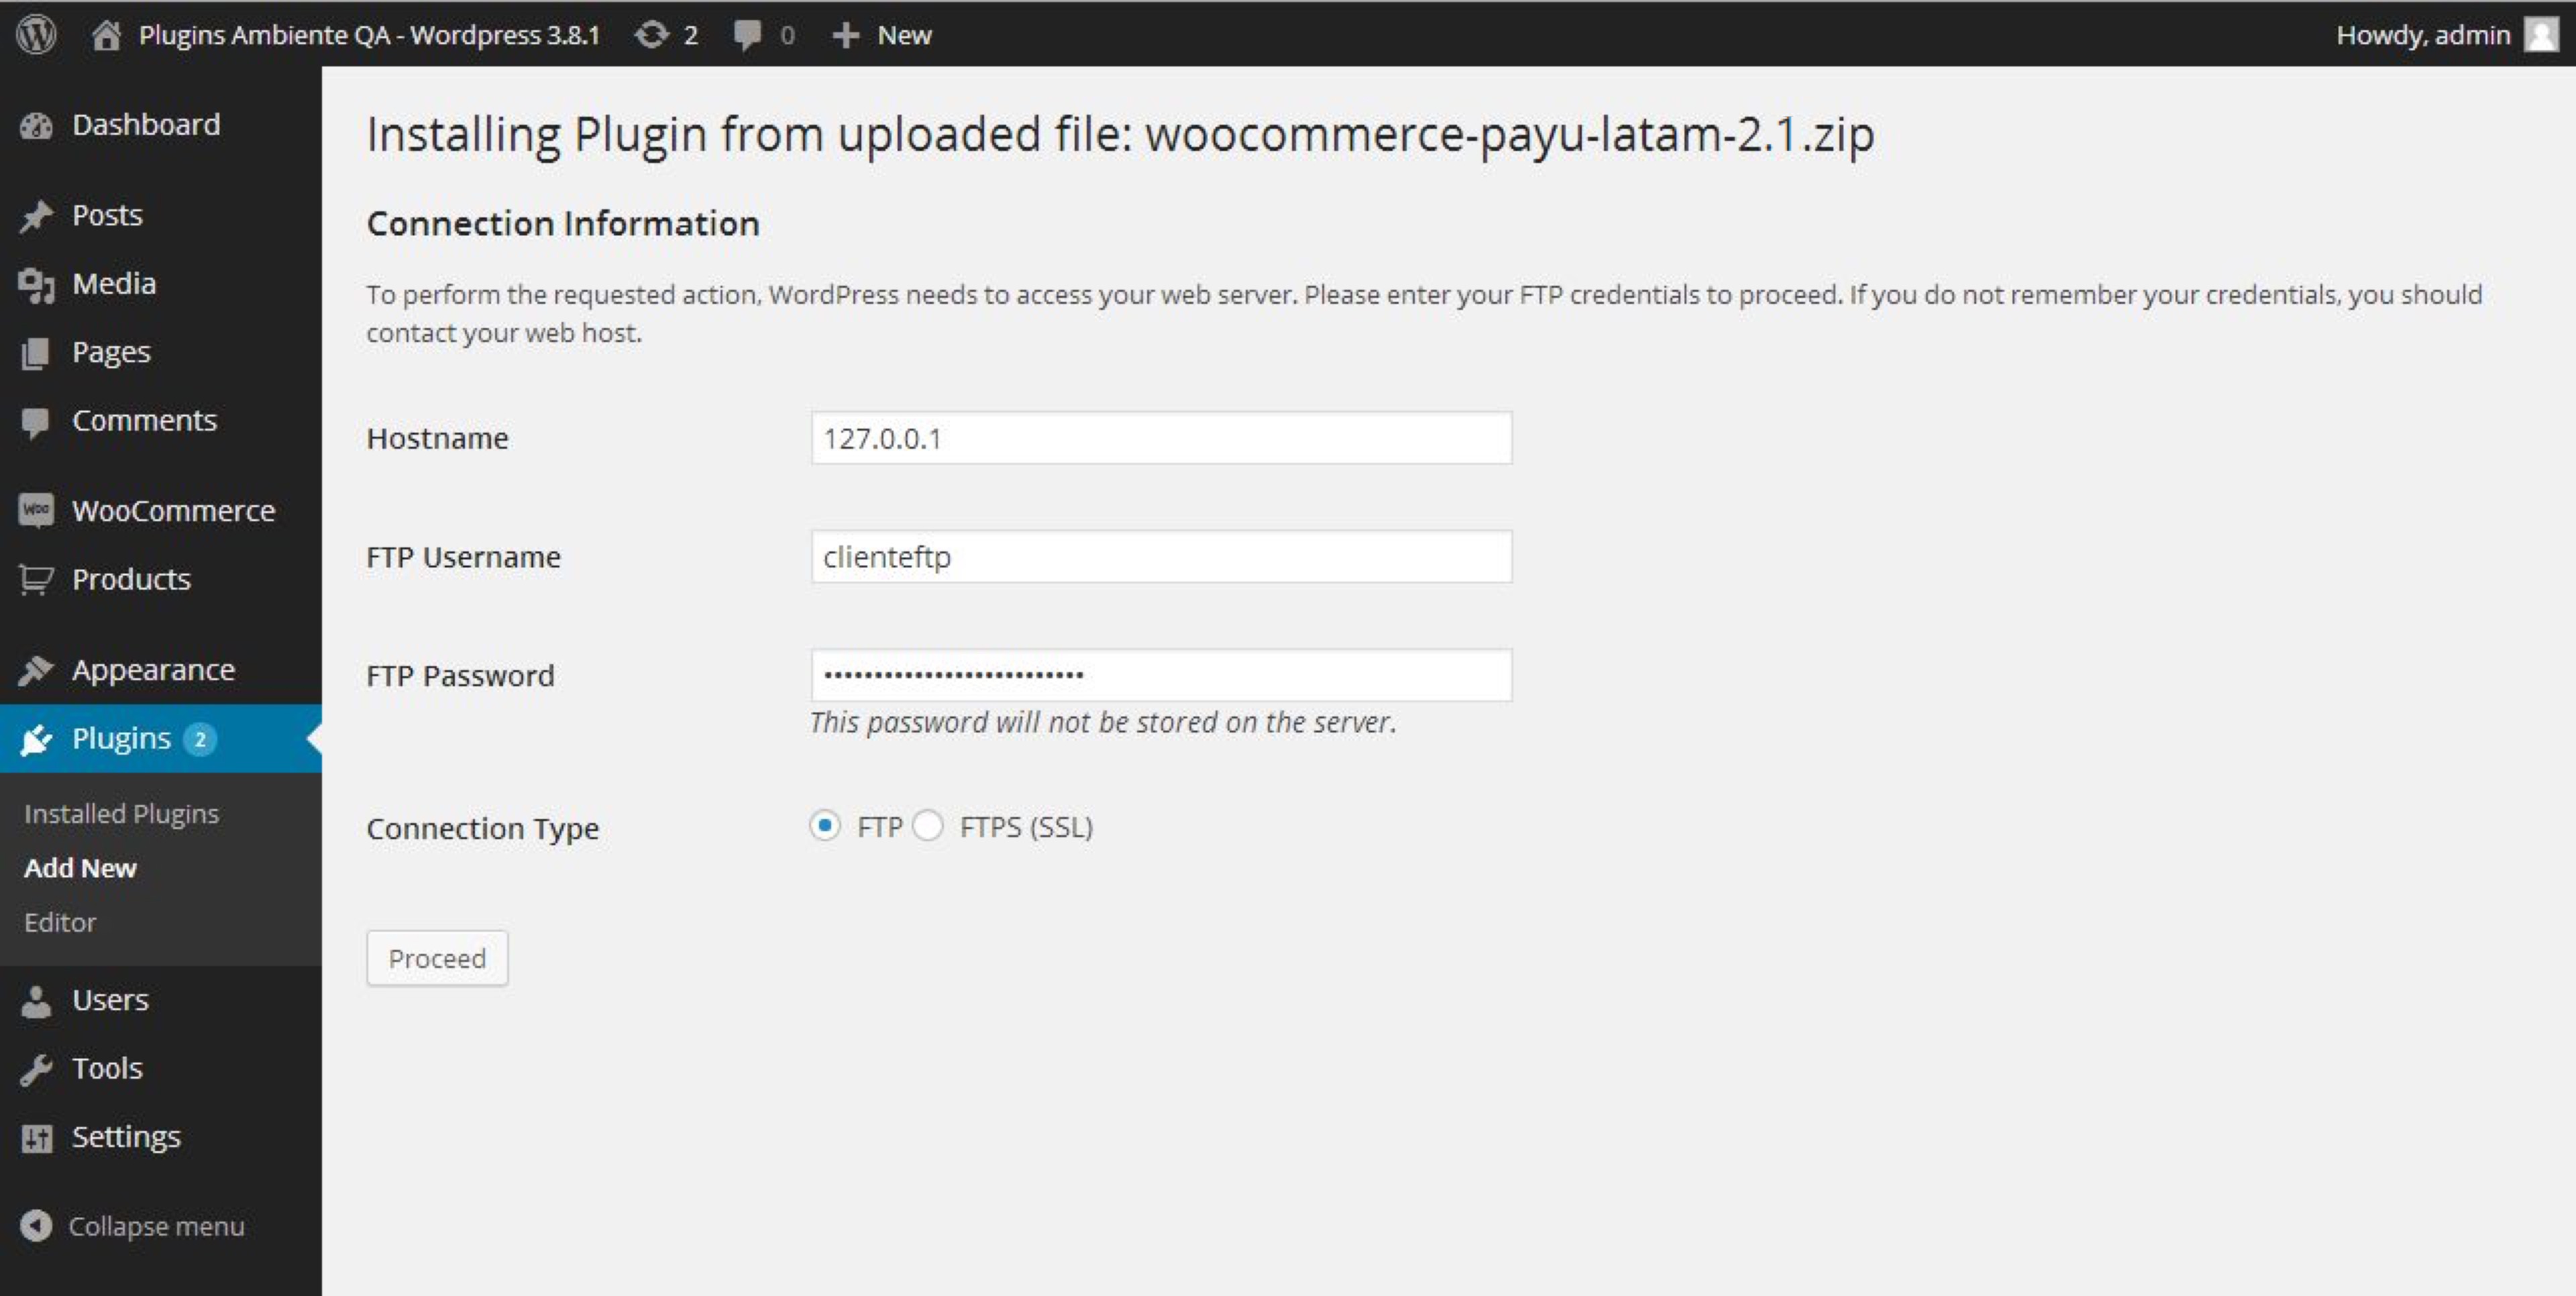
Note
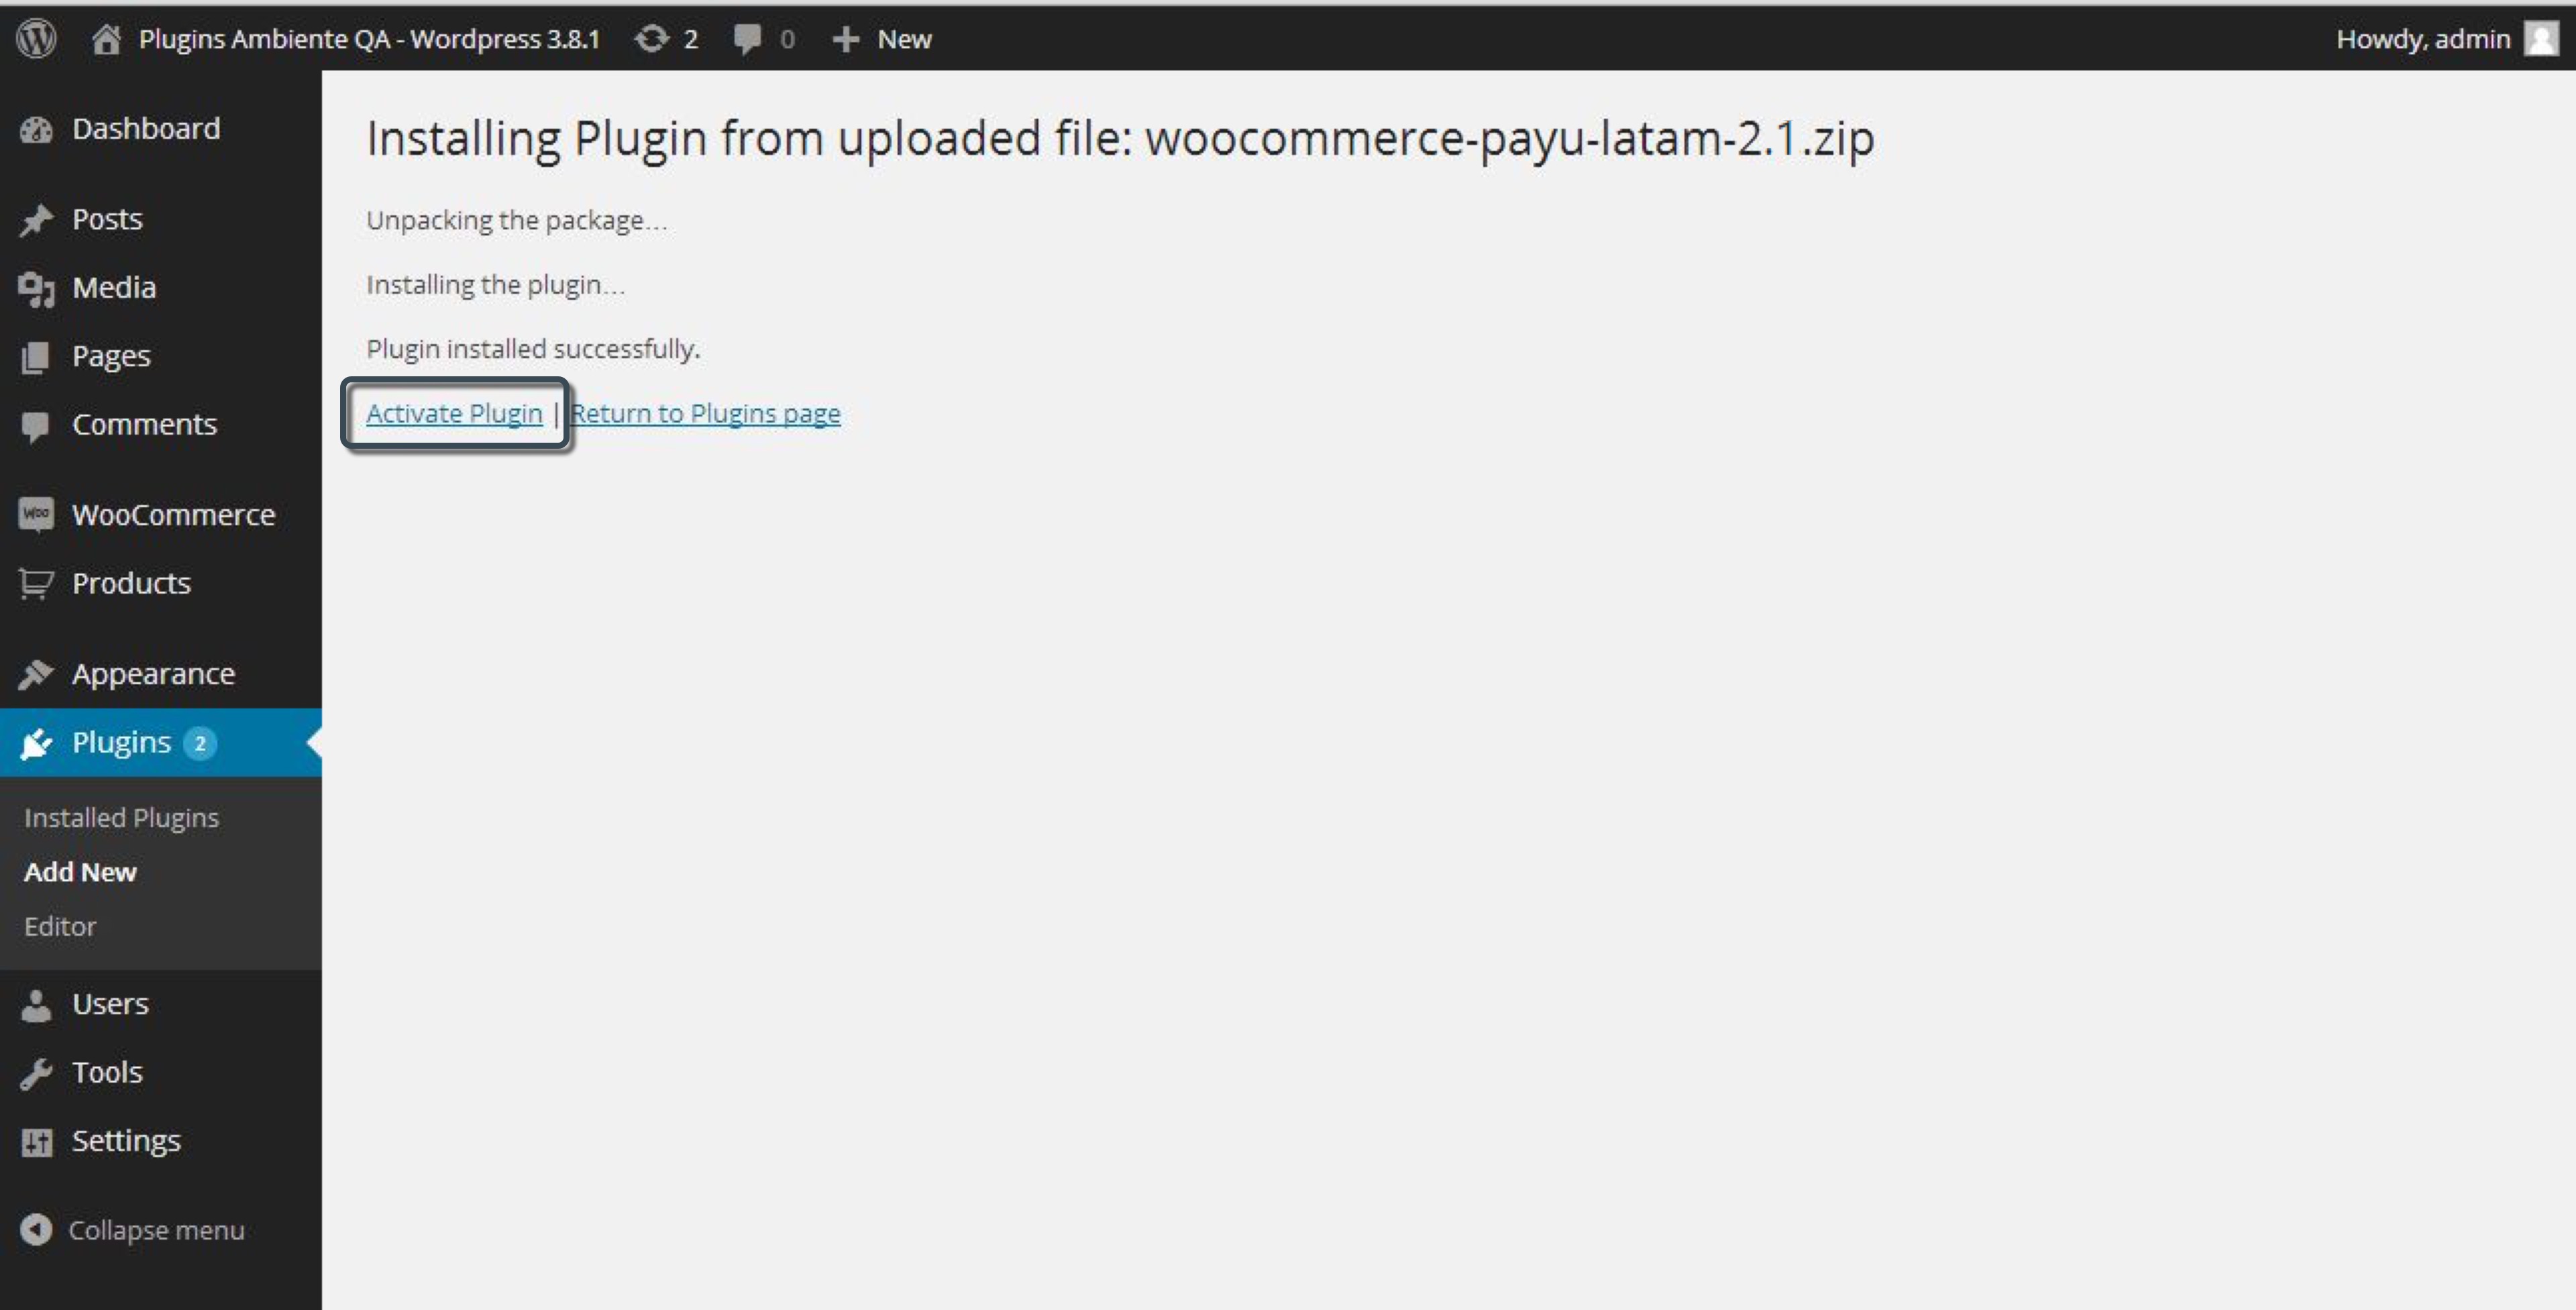
This step depends on the initial configuration of WordPress. The installation of the plugin is not affected if you don’t see this screen.- Finally, activate the plugin you have installed by clicking the Activate Plugin link.
Configuration
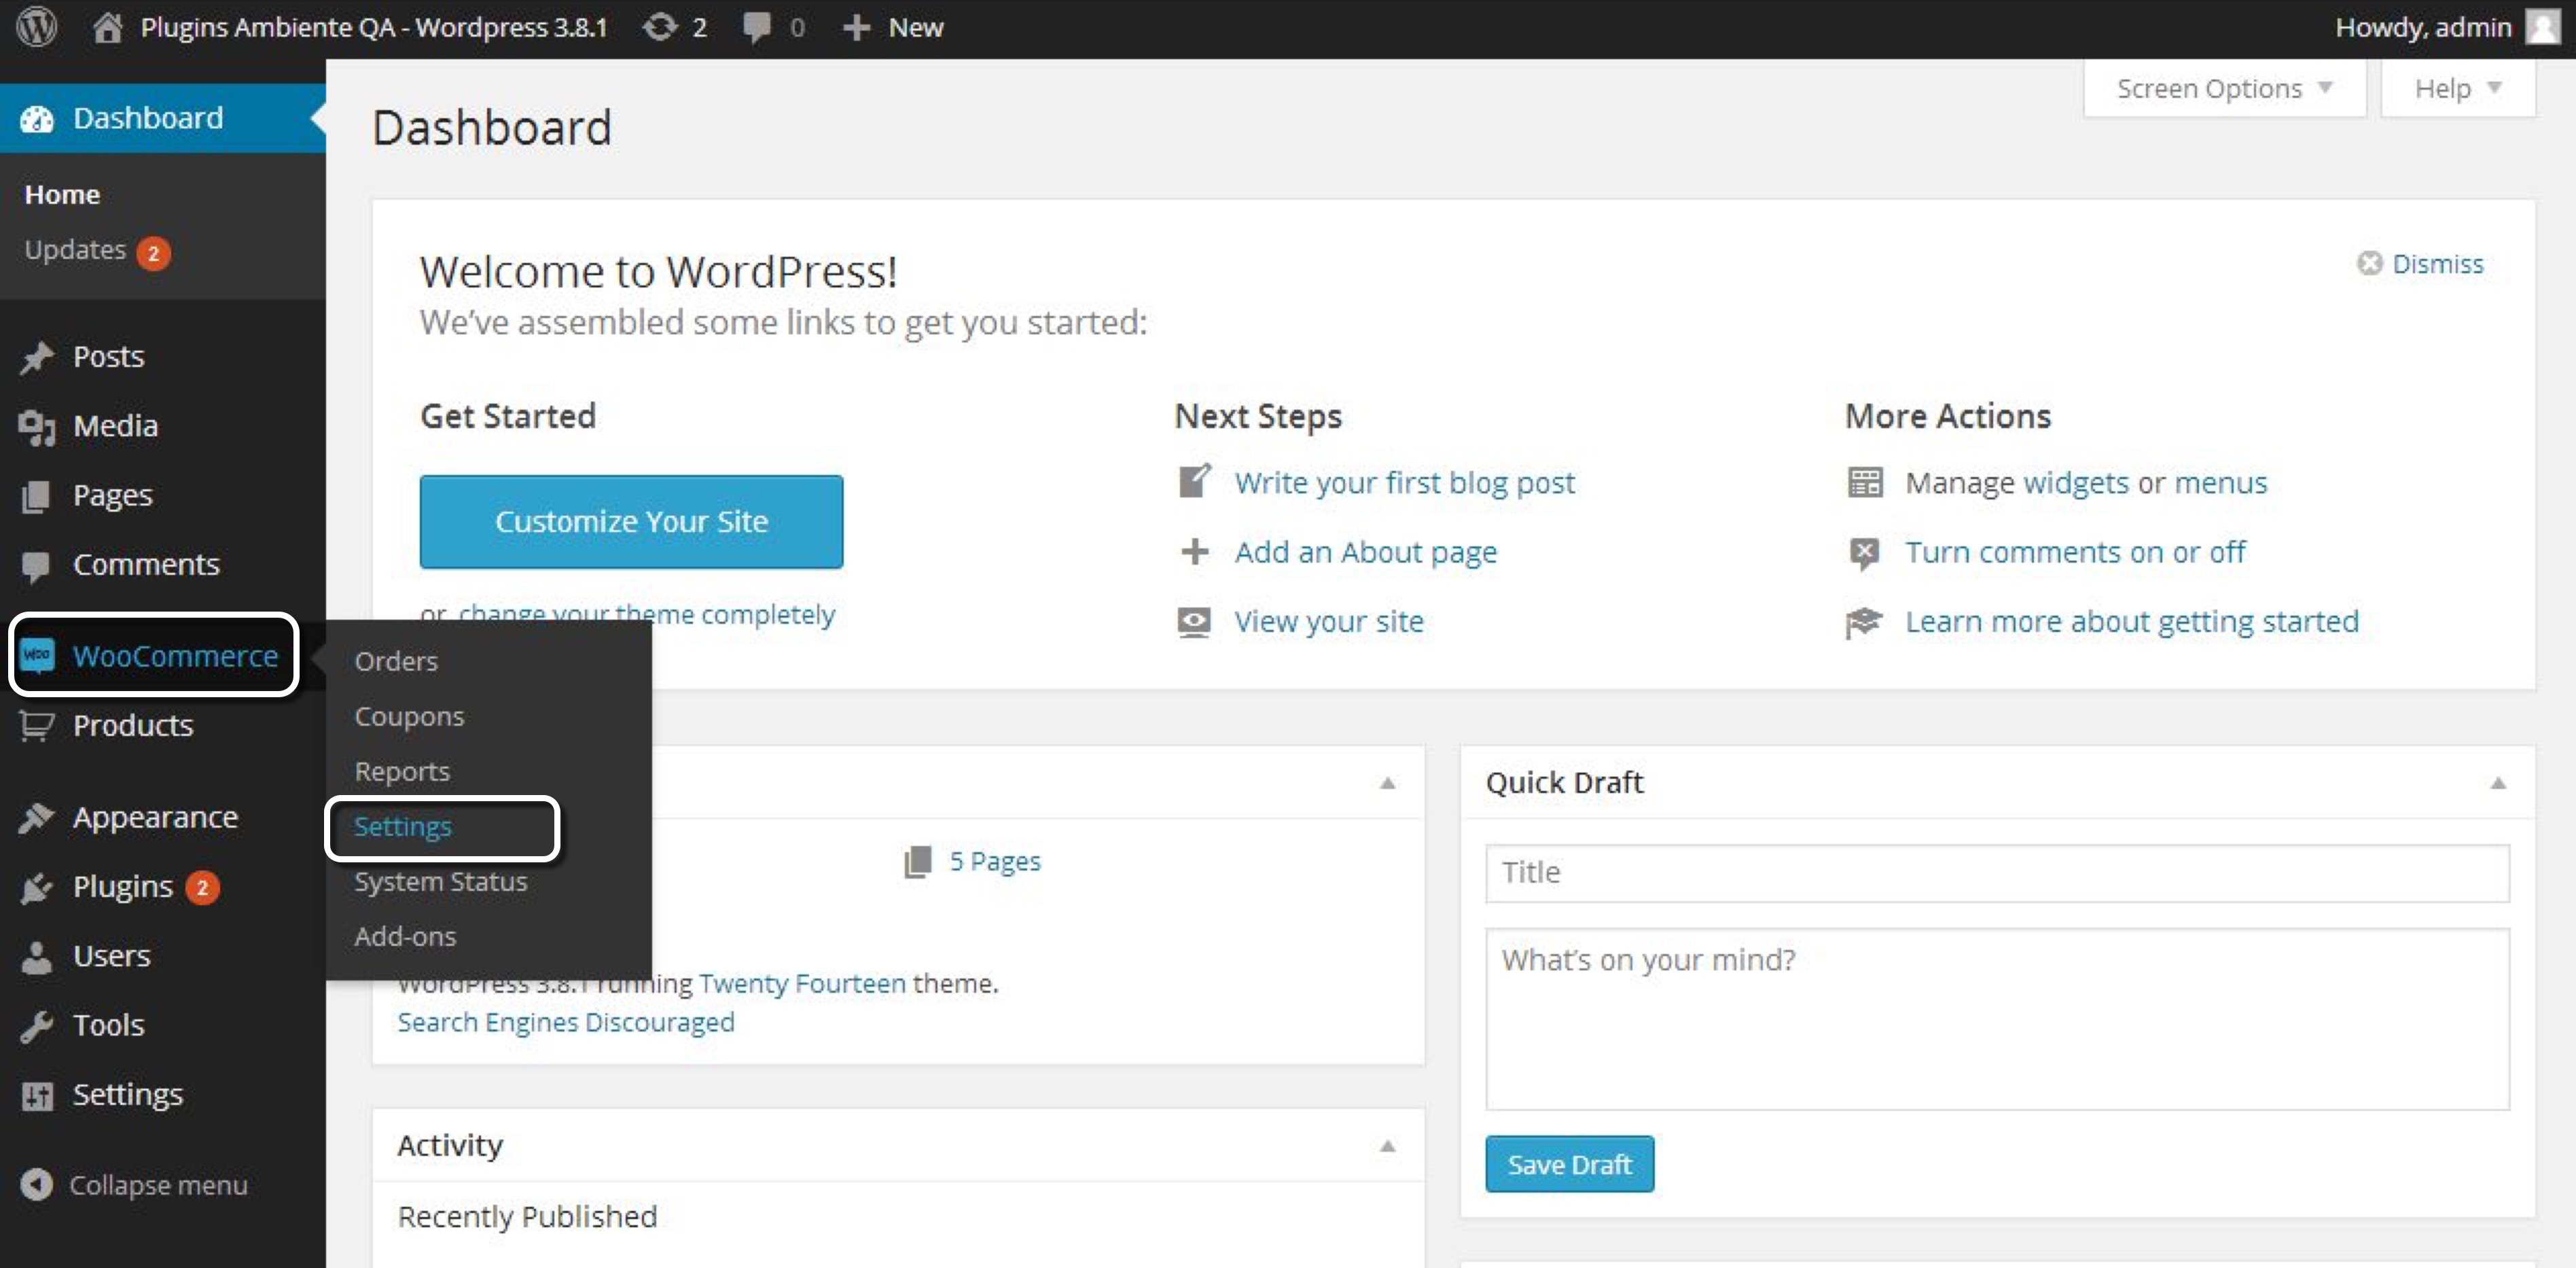
- Back in the Dashboard, expand the WooCommerce menu in the left panel and click Settings.
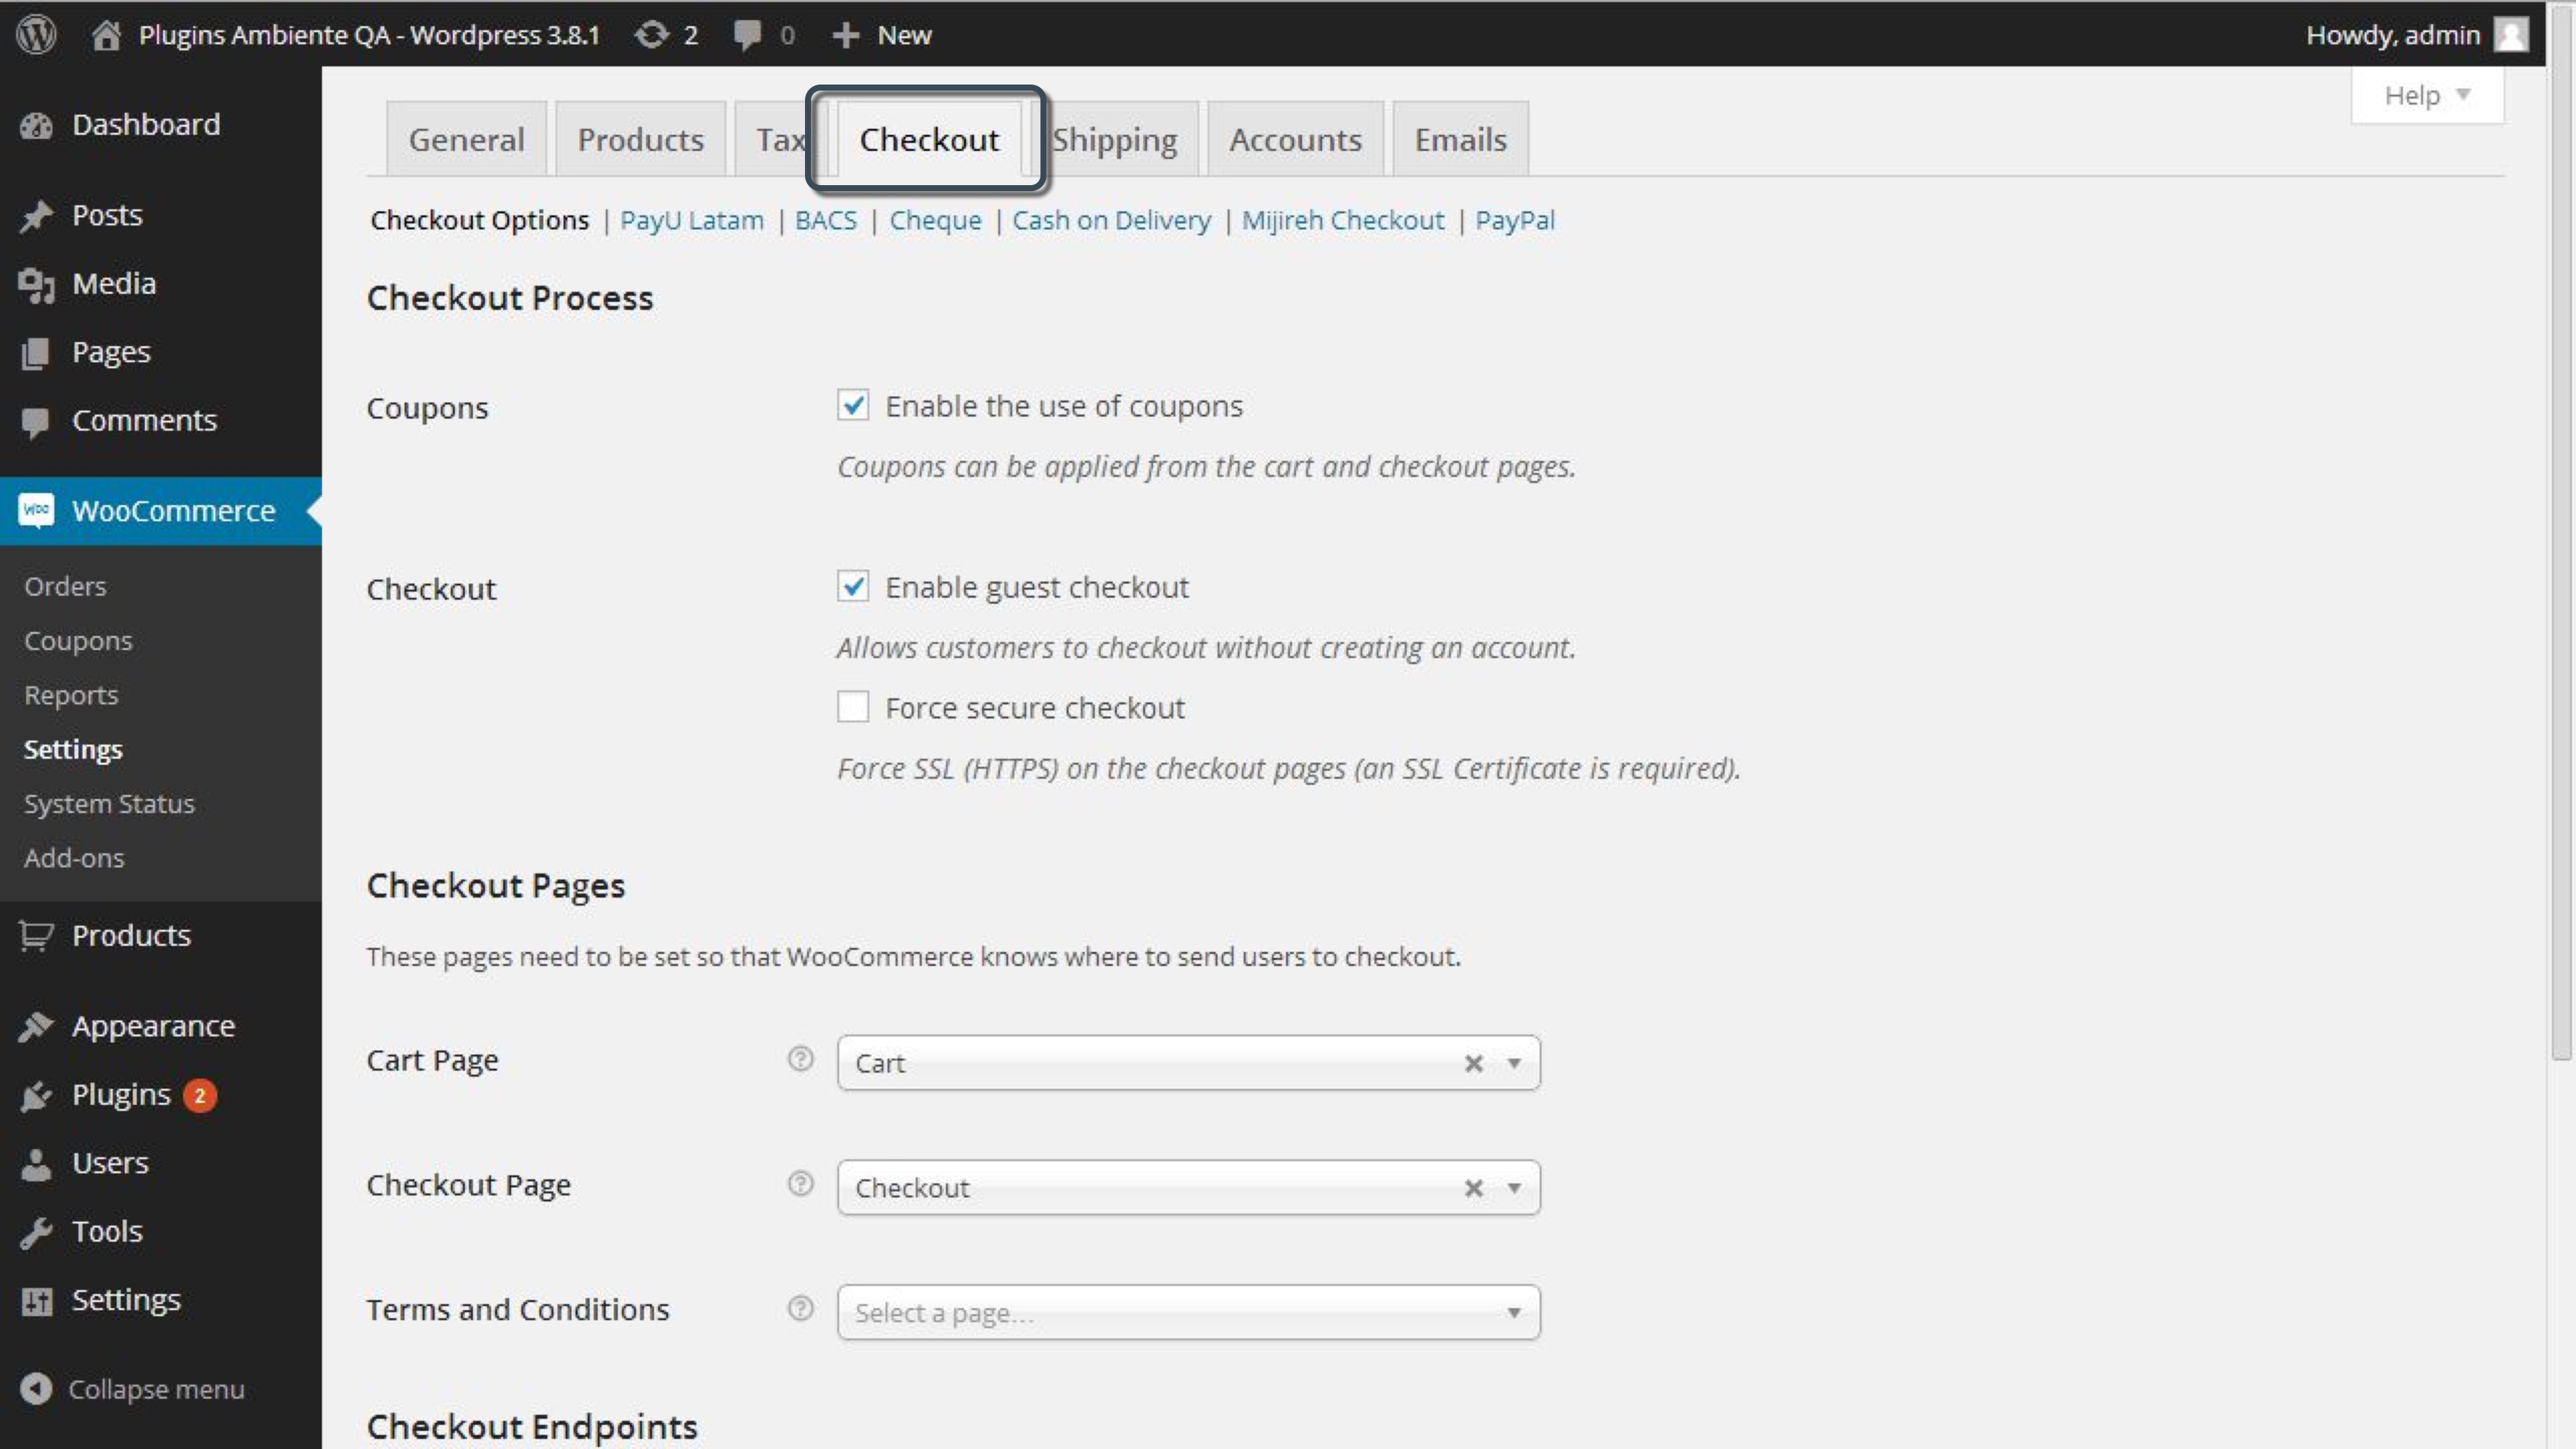
- Go to the Checkout tab.
- Scroll down to Payment Gateways table. Then, find PayU Latam and drag and drop to the top of the table.
Click the radio of the Default column.
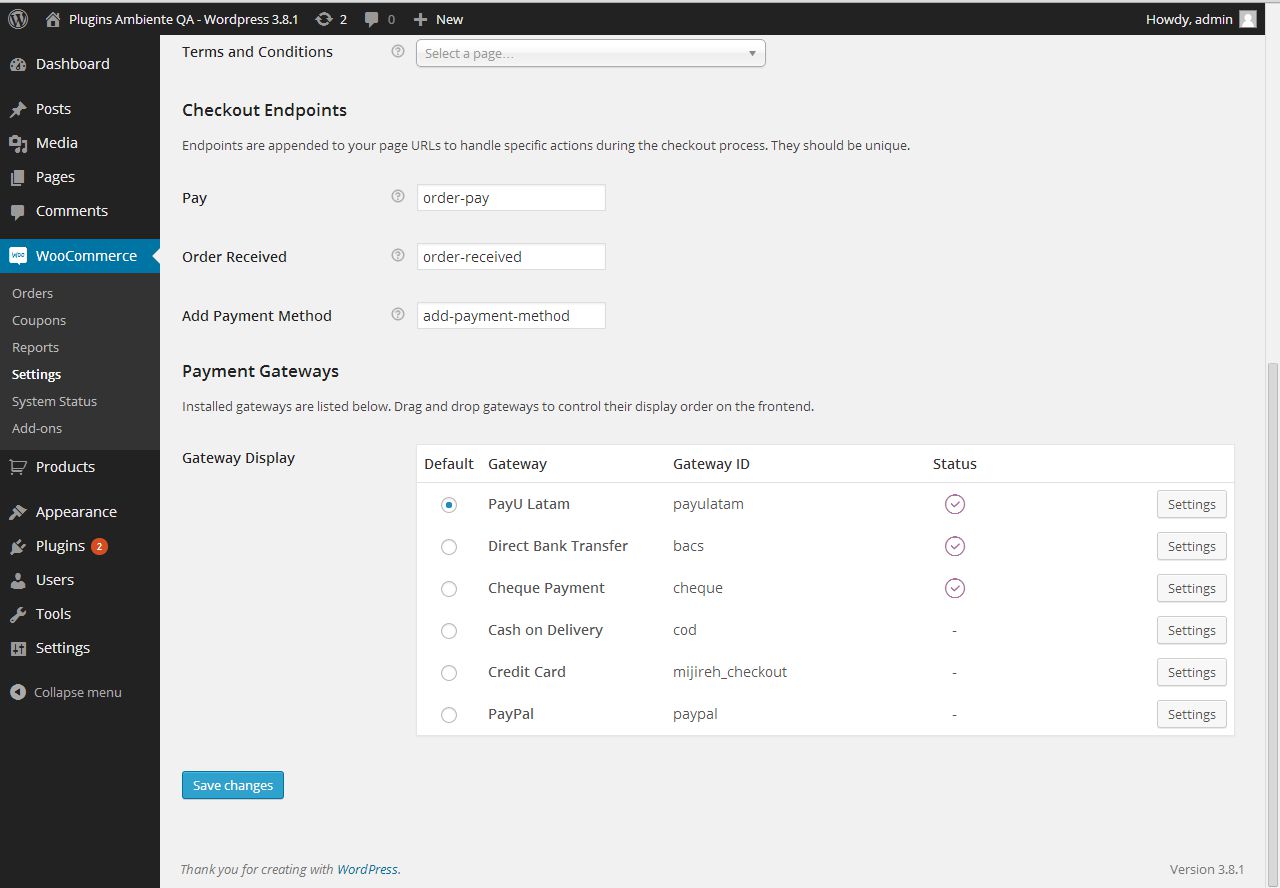
Save the changes.
- Click the PayU Latam link at the top of the tab and configure the data of your PayU account.
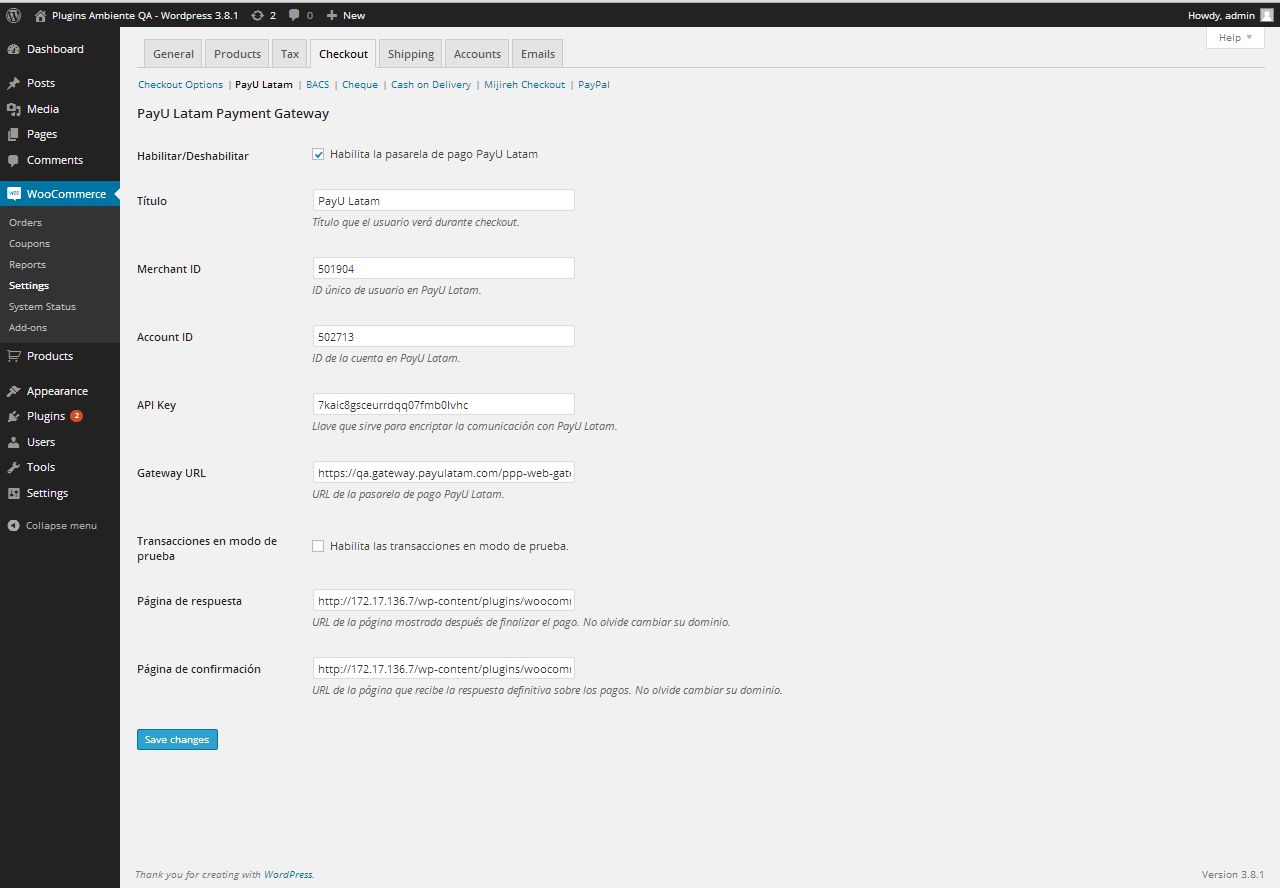
The following table explains the values:
| Field | Value |
|---|---|
| Enable / Disable | Mark this checkbox to enable the payment gateway in WooCommerce. |
| Title | Title displayed for the Payment Method. The default value is PayU Latam. |
| Merchant ID | ID of your commerce in PayU Latam |
| Account ID | ID of the PayU account according to the country where you want to sell. |
| API key | Unique key of your commerce, you can find this key in the PayU module. |
| Gateway URL | Gateway URL. For test, you can use https://sandbox.checkout.payulatam.com/ppp-web-gateway-payu and for production https://checkout.payulatam.com/ppp-web-gateway-payu |
| Transaction in test mode | Mark this checkbox to make transactions the test mode. |
| Response page | URL of the response page. By default, the URL is https://your.domain.com/wp-content/plugins/woocommerce-payu-latam/response.php, you must replace https://your.domain.com with your site’s domain. |
| Confirmation page | URL of the confirmation page. By default, the URL is https://your.domain.com/wp-content/plugins/woocommerce-payu-latam/confirmation.php, you must replace https://your.domain.com with your site’s domain. |
- Finally, click Save changes button. At this point, your customers can pay with PayU Latam when they do the checkout in the WooCommerce’s shopping cart.
Last modified
July 18, 2025:
Documentation updates (4f4830fa0)