VirtueMart
This article shows you the procedure to enable PayU on your VirtueMart website.
Prerequisites
- You need an active account in PayU Latam.
- For VirtueMart version 2 or higher:
- For VirtueMart version 3.0.6:
Plugin for VirtueMart 2 or higher
Follow the next procedure to install and configure the plugin on your website.
Installation
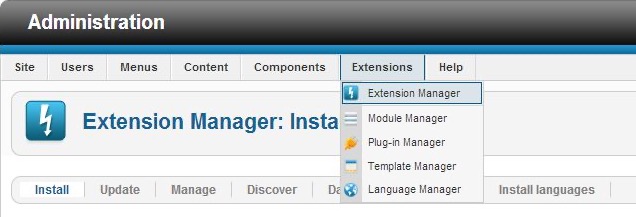
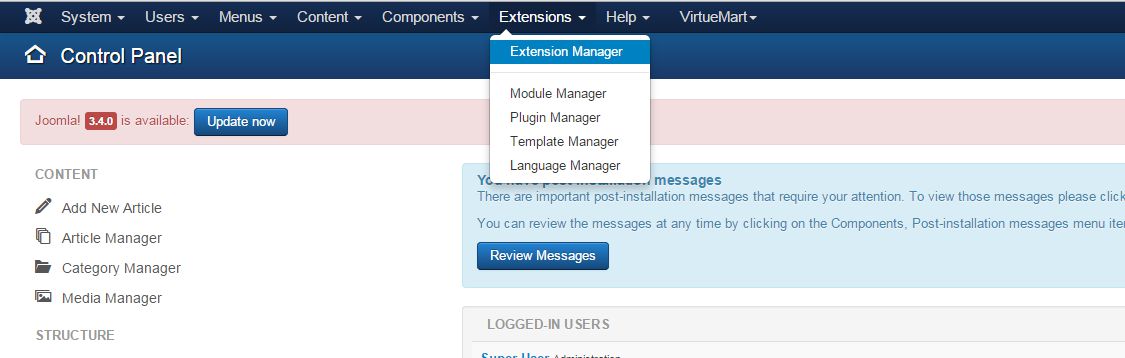
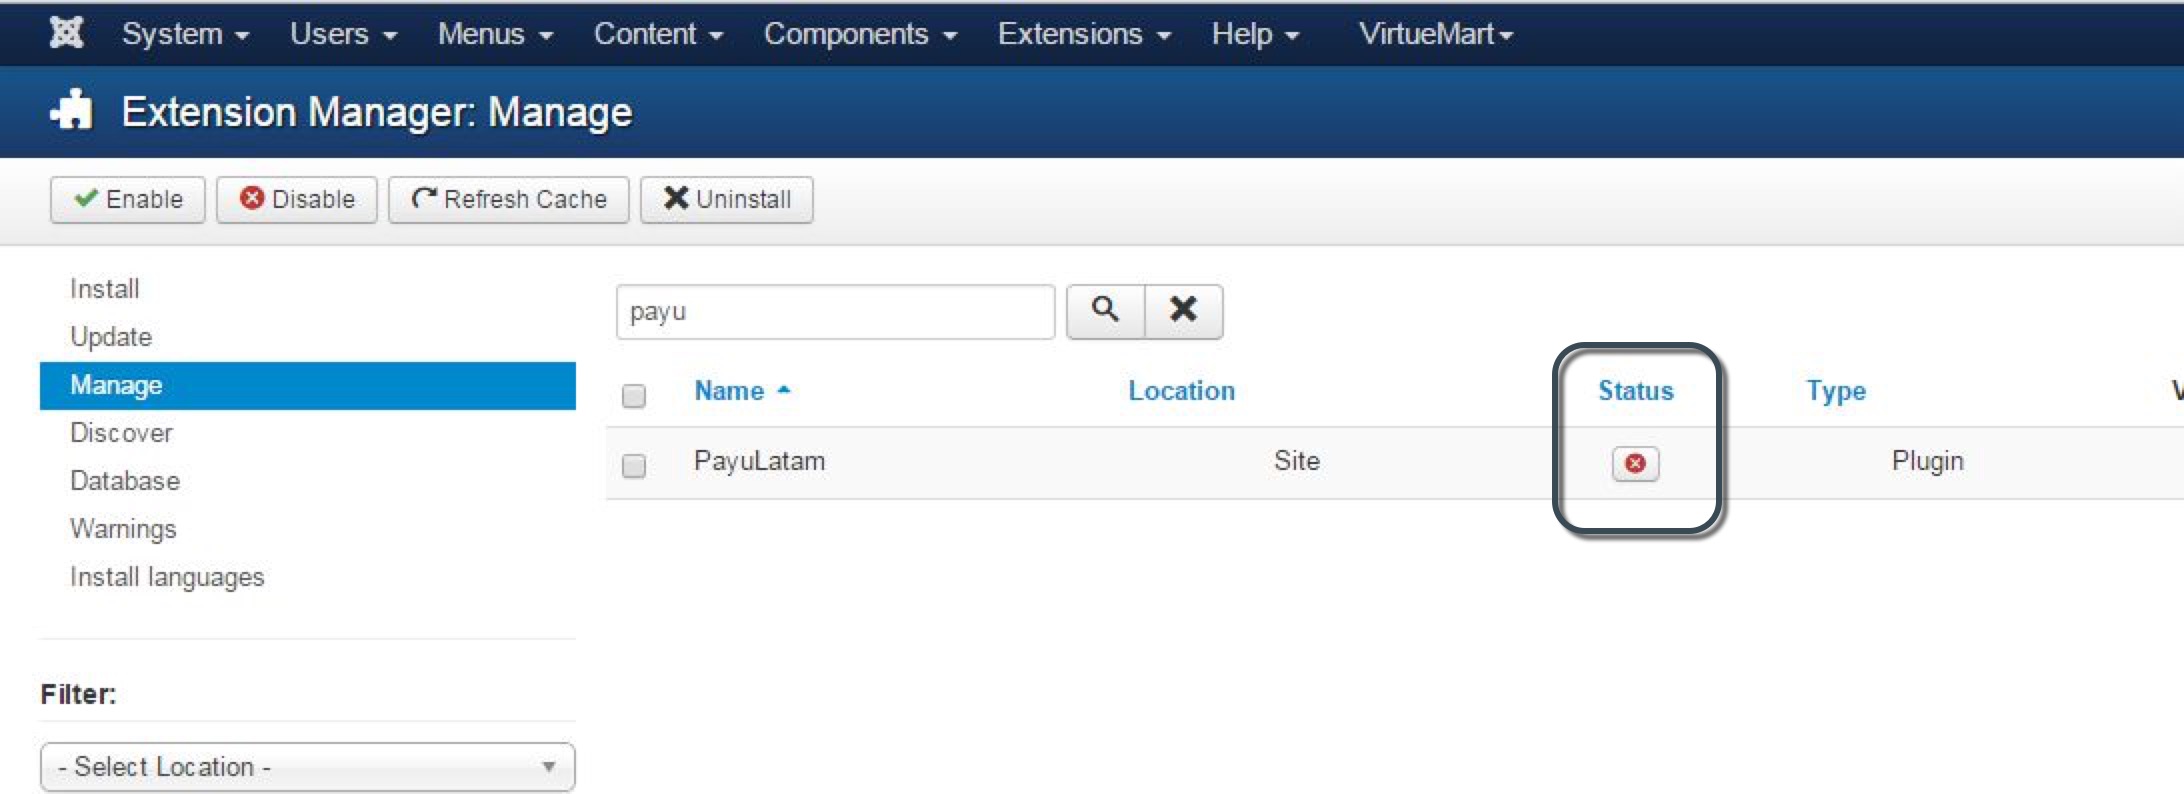
- Open the Joomla!® Administrator Console and select the Extension Manager option located in the Extension menu.
- In the Upload Package File section, click Browse and locate the .zip file of the PayU plugin downloaded.

- Once the installation procedure completes, a message appears to inform that the installation was successful.

Configuration
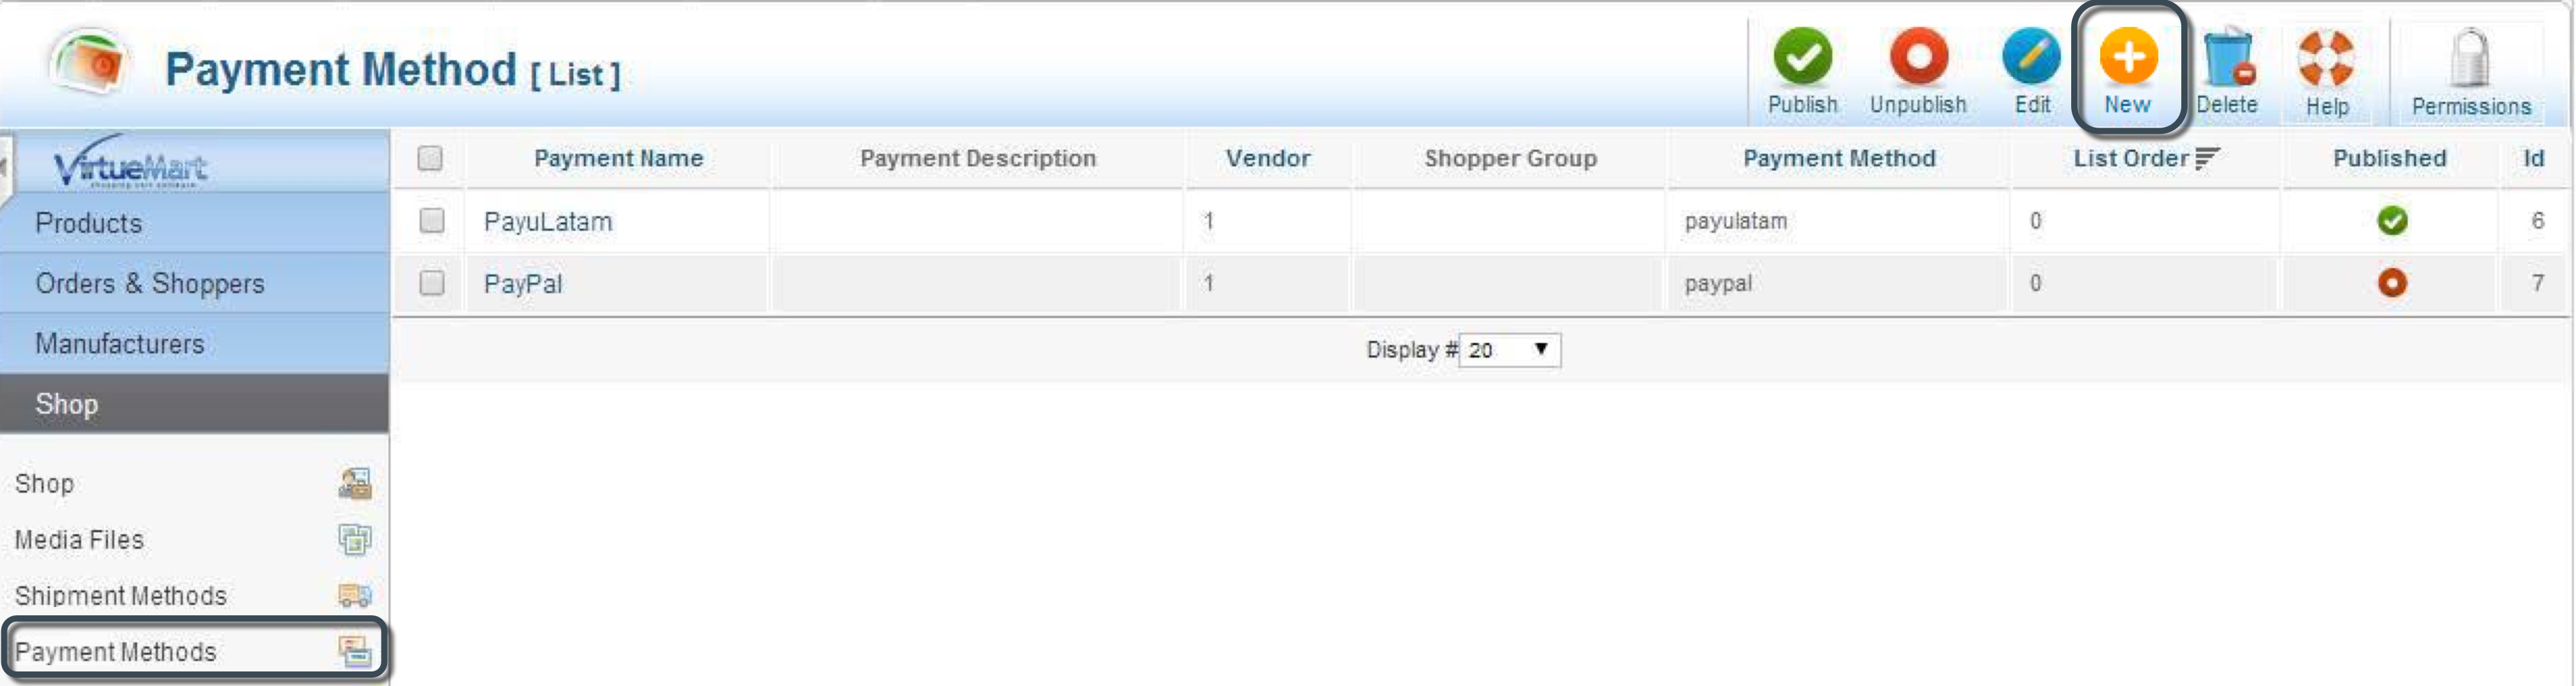
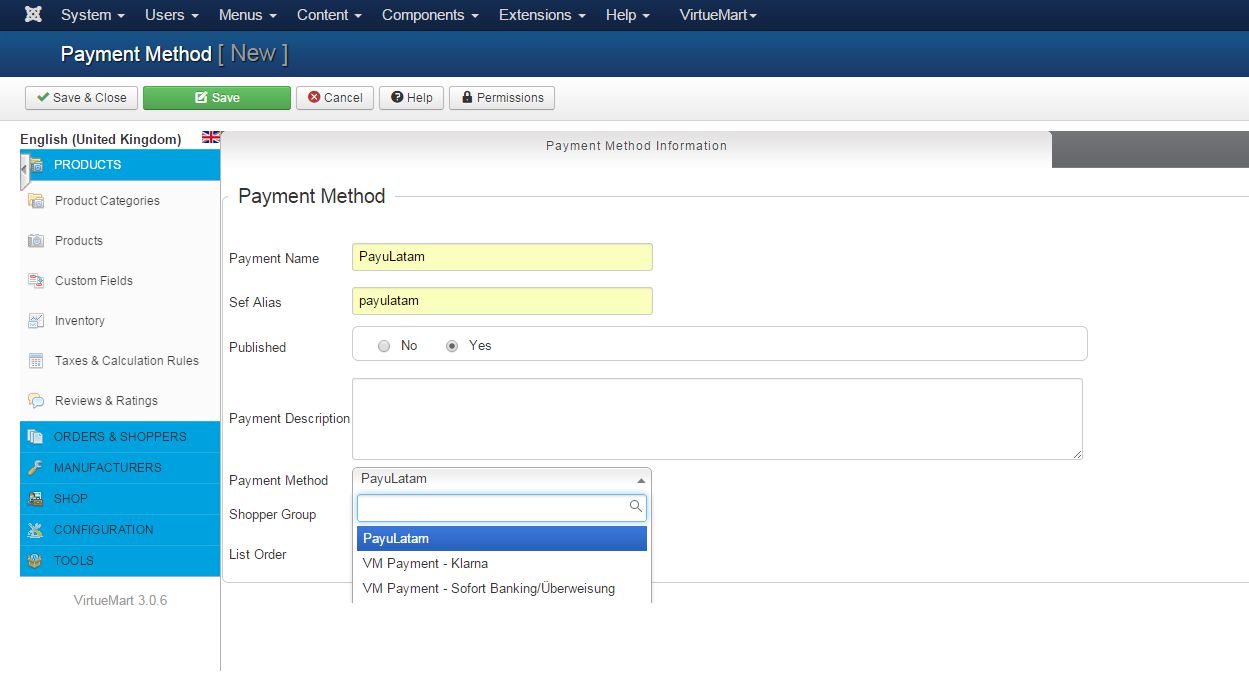
- Expand the option Shop in the VirtueMart menu and select Payment methods. Then, click New at the top right of the screen.
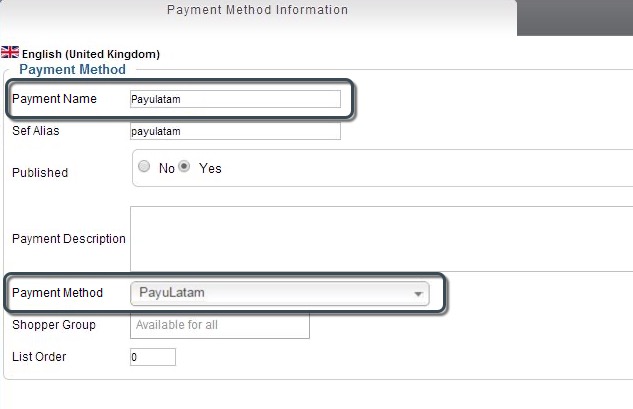
- In the Payment Method Information tab, set Payulatam as Payment Name and select
PayuLatamin the Payment Method field.
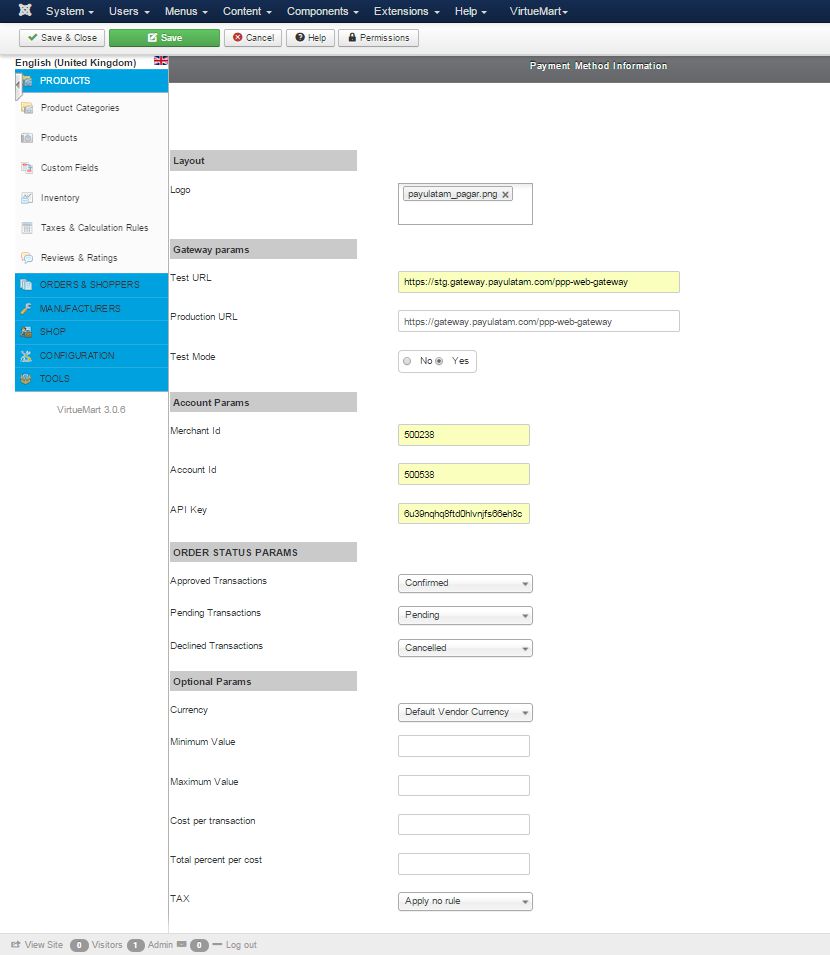
- Go to the Configuration tab and provide the information of your account and your API key.
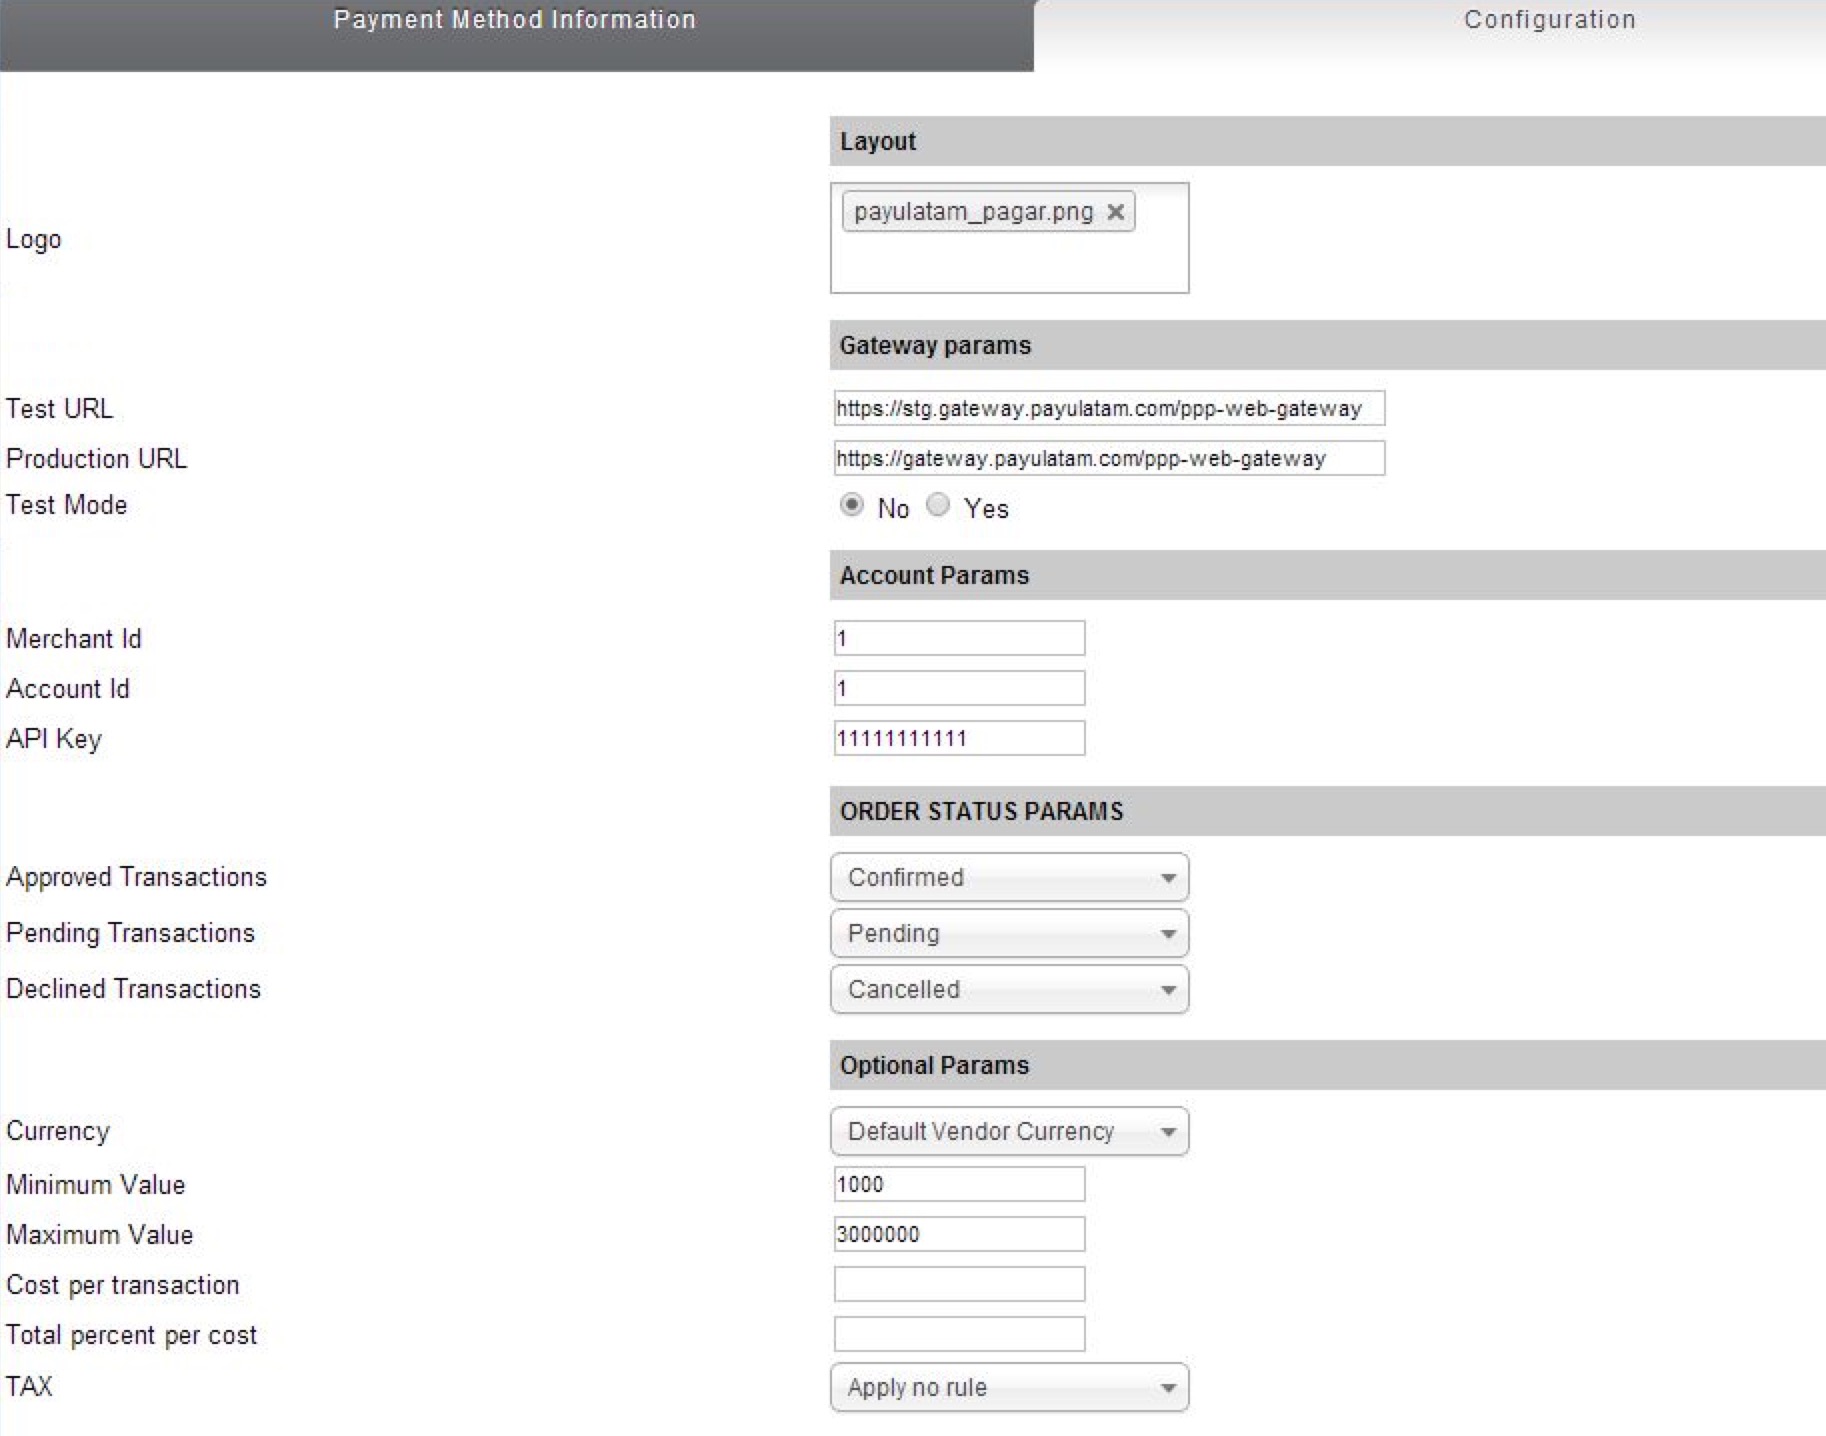
Furthermore, provide the connection URL to the gateway and the configuration variables explained in the Configuration variables section.
The URLs for test and production environments are:
- Test:
https://sandbox.gateway.payulatam.com/ppp-web-gateway - Production:
https://gateway.payulatam.com/ppp-web-gateway/
- Finally, click Save or Save & Close button. At this point, your customers can pay with PayU Latam using the VirtueMart shopping cart.
Plugin for VirtueMart 3.0.6
Follow the next procedure to install and configure the plugin on your website.
Installation
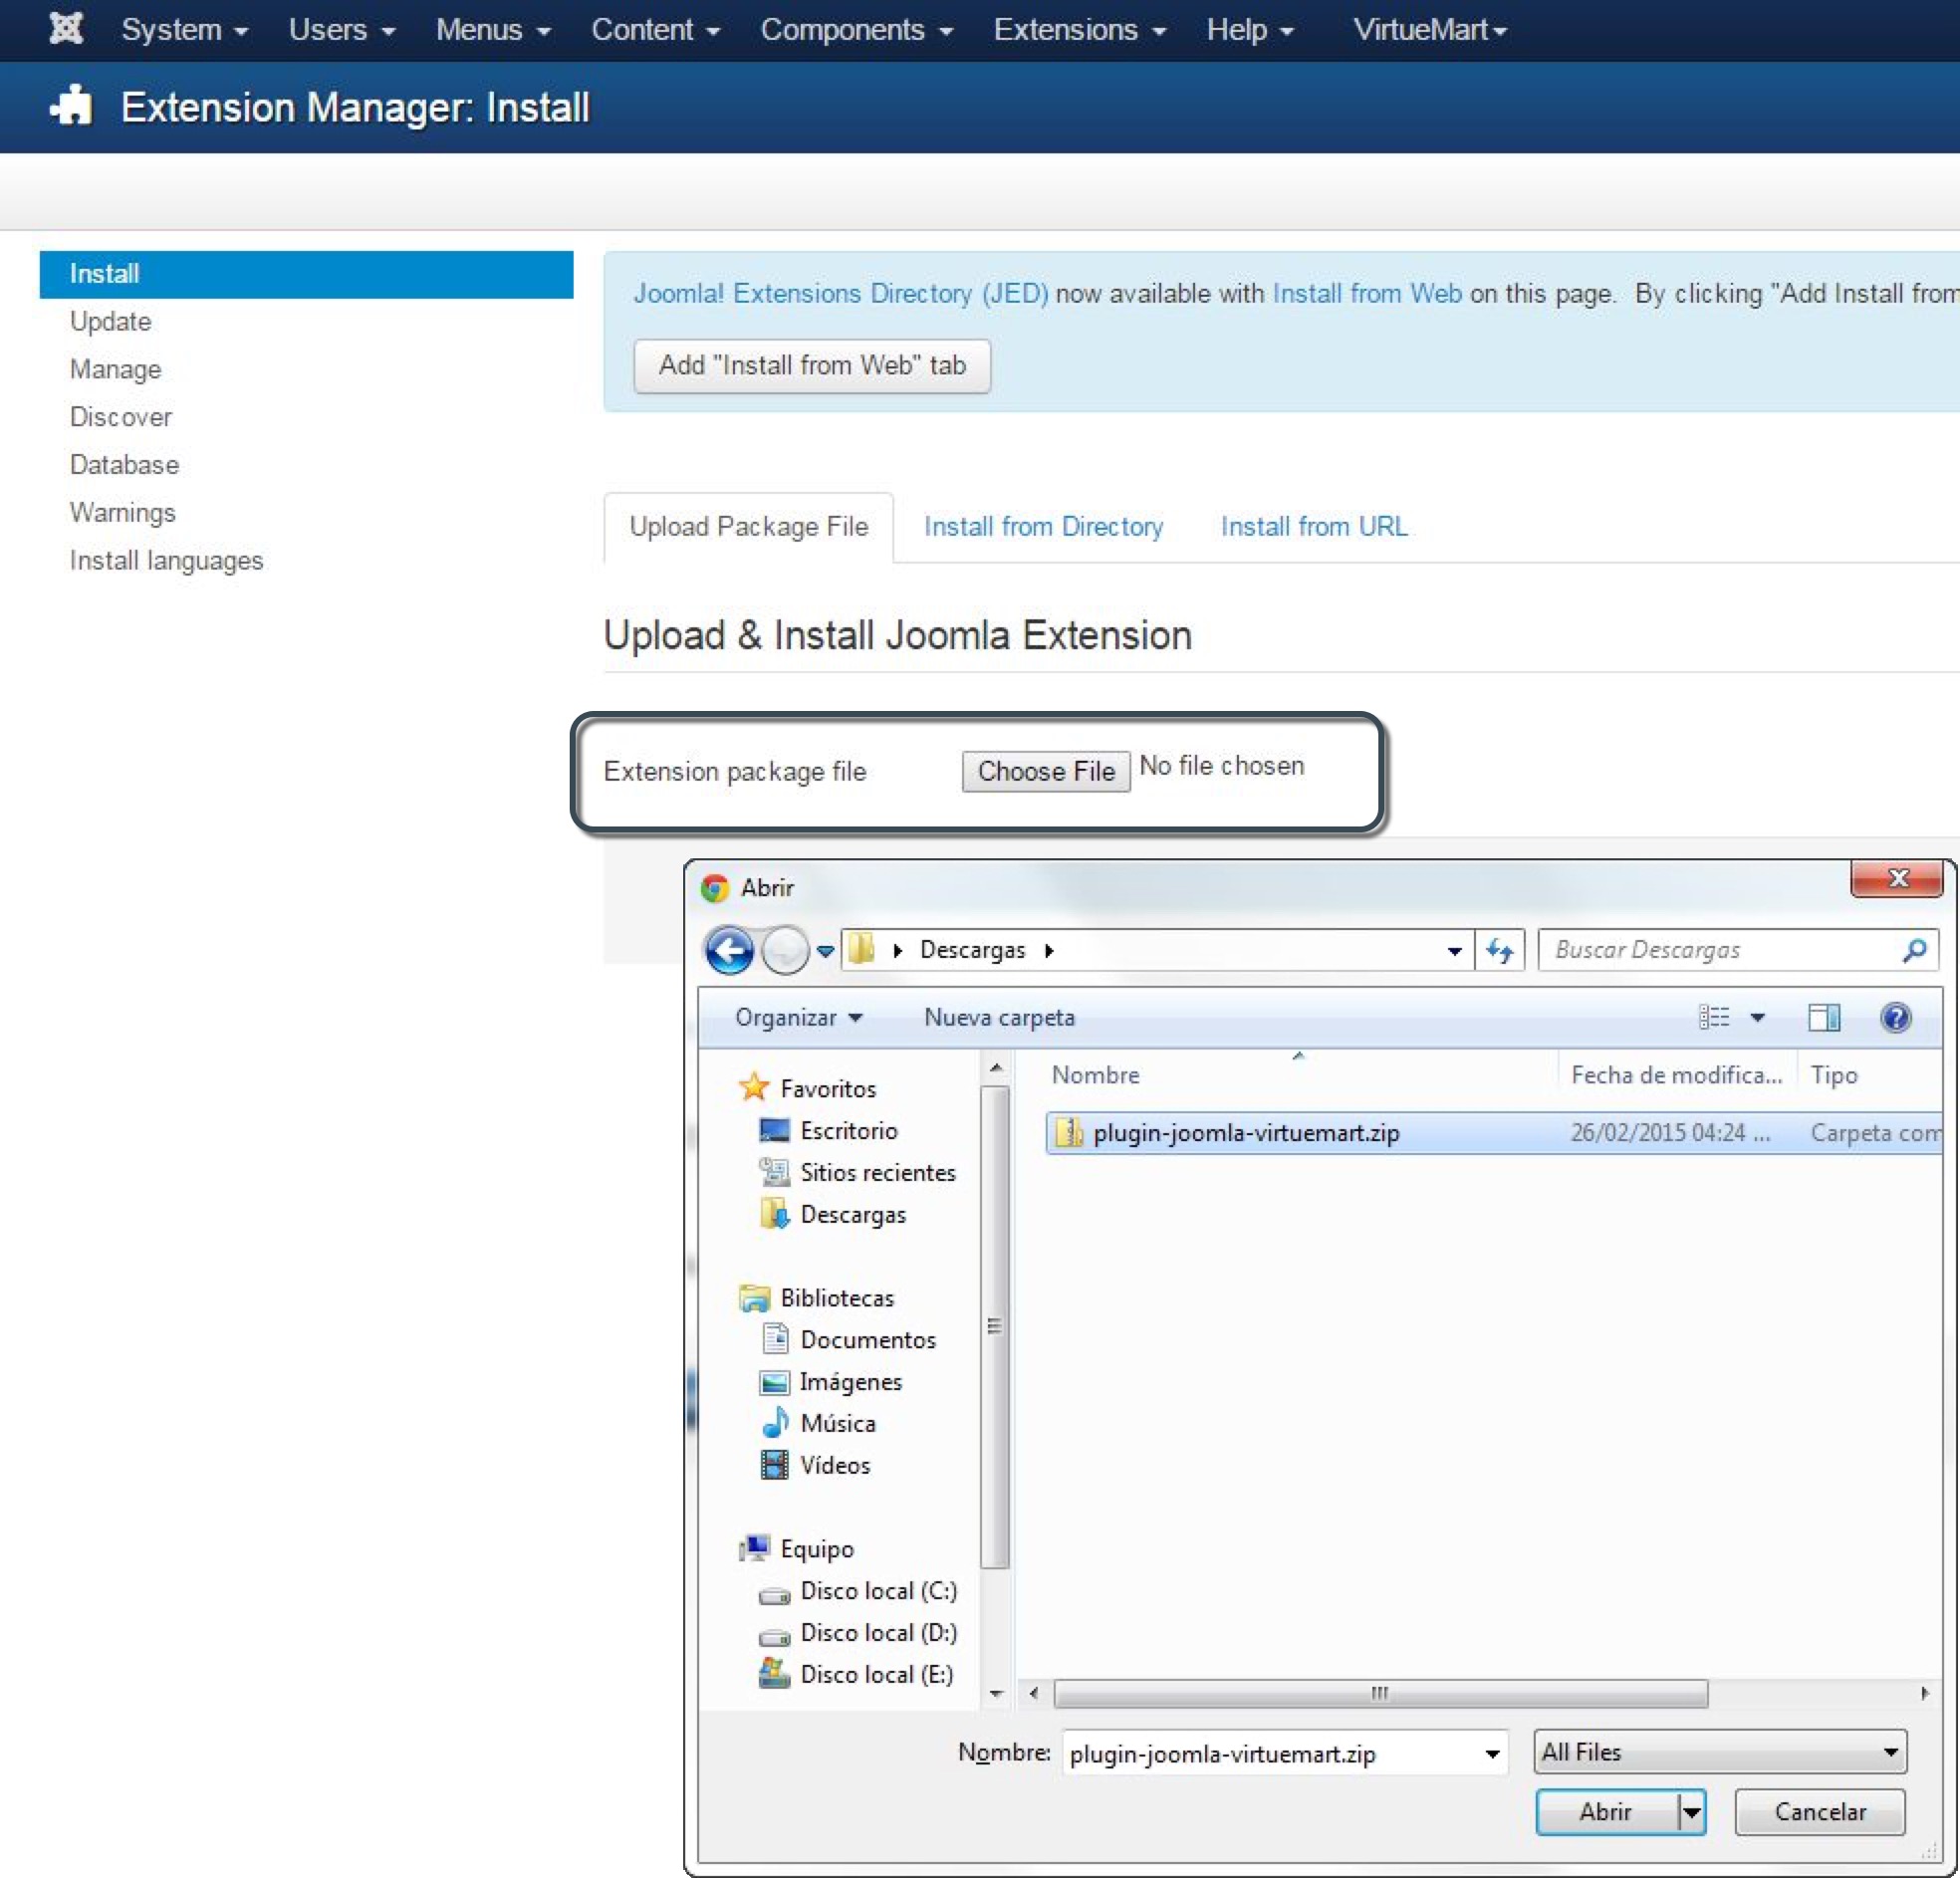
- Open the Joomla!® Administrator Console and select the option Extension Manager inside the Extensions menu.
- In the Extension package file field, choose the previously downloaded .zip file.
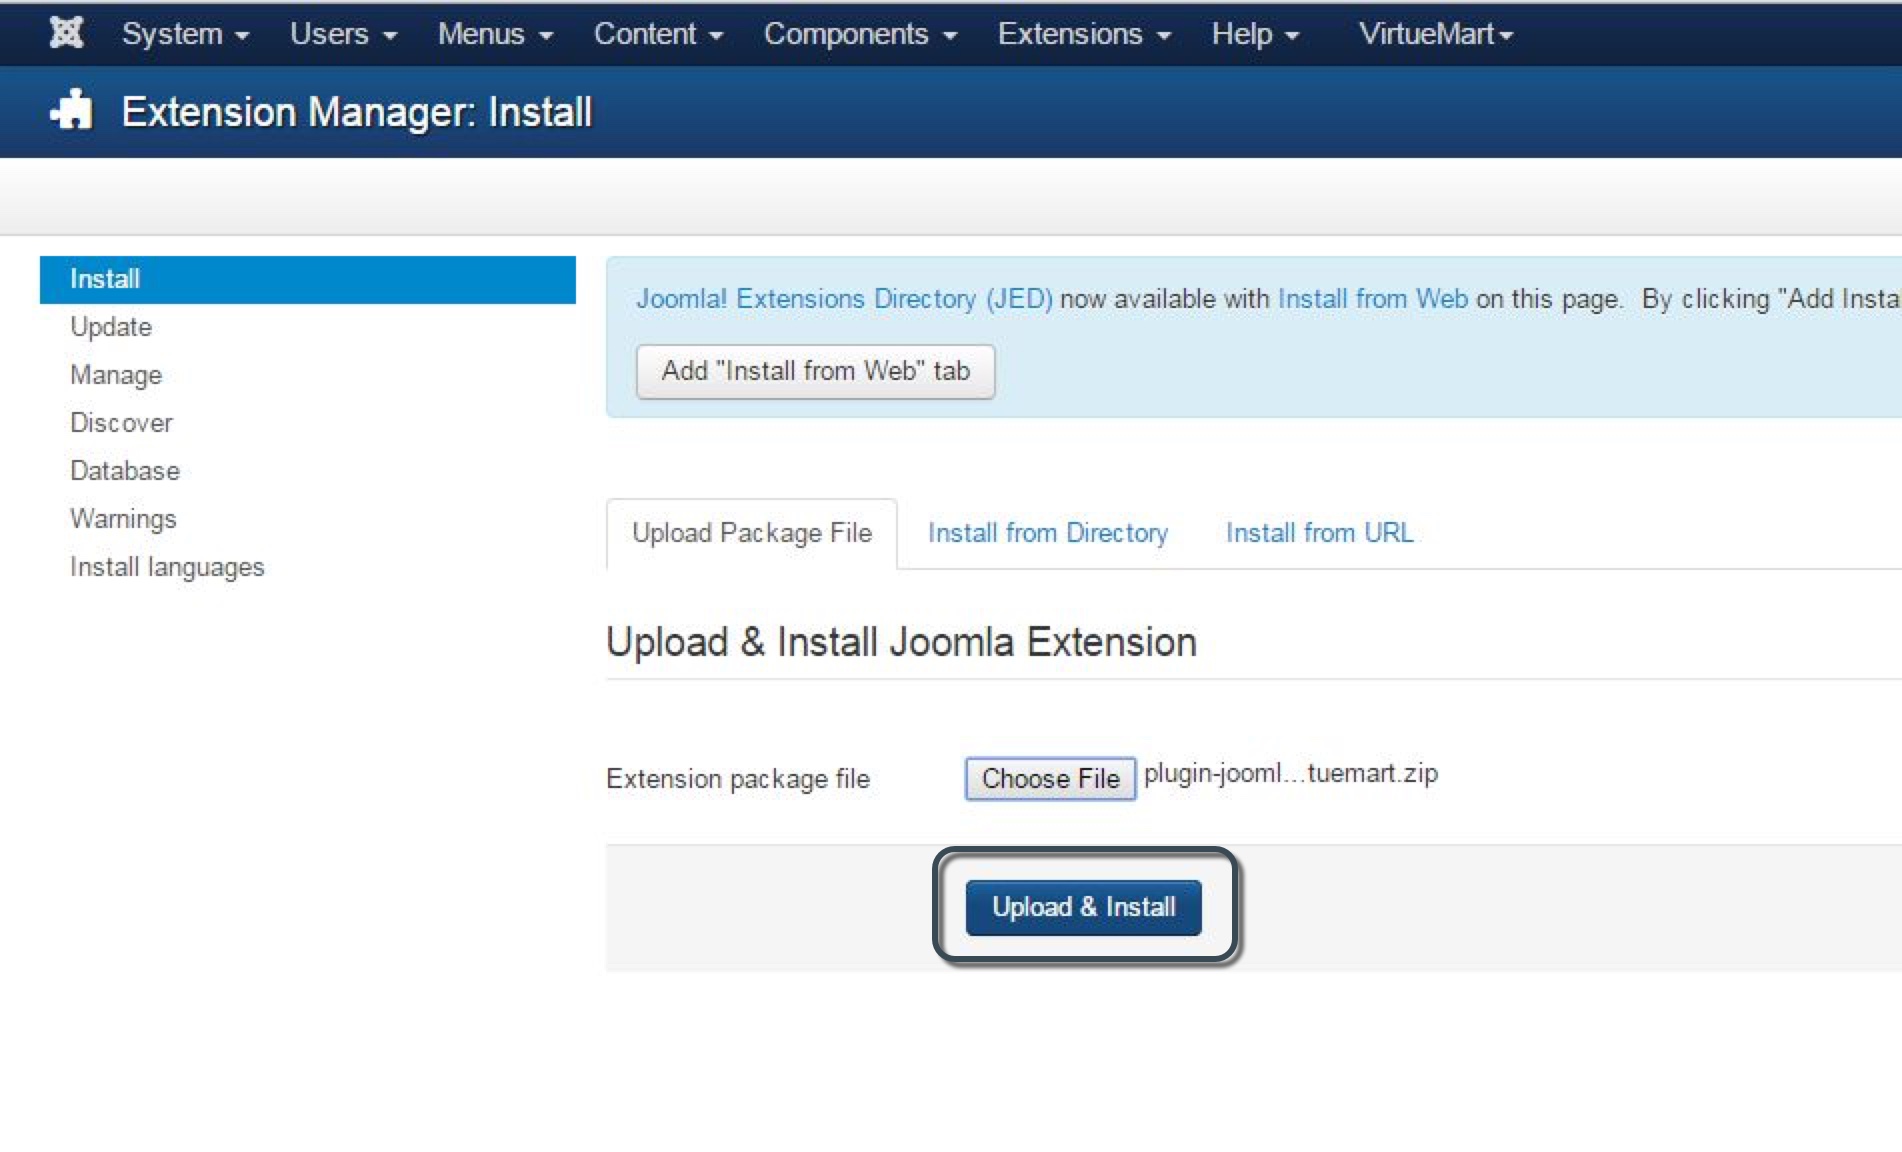
- Once the .zip file is loaded, click Upload & Install.
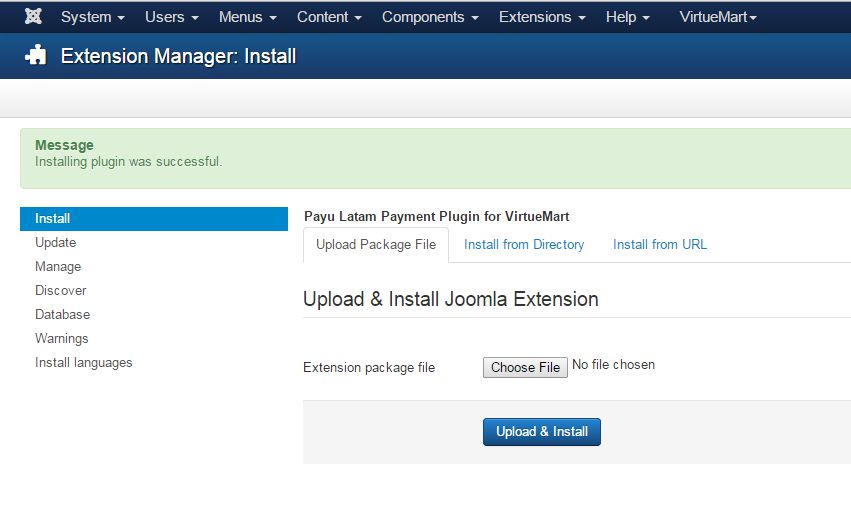
- Once the installation procedure completes, a message appears to inform that the installation was successful.
Configuration
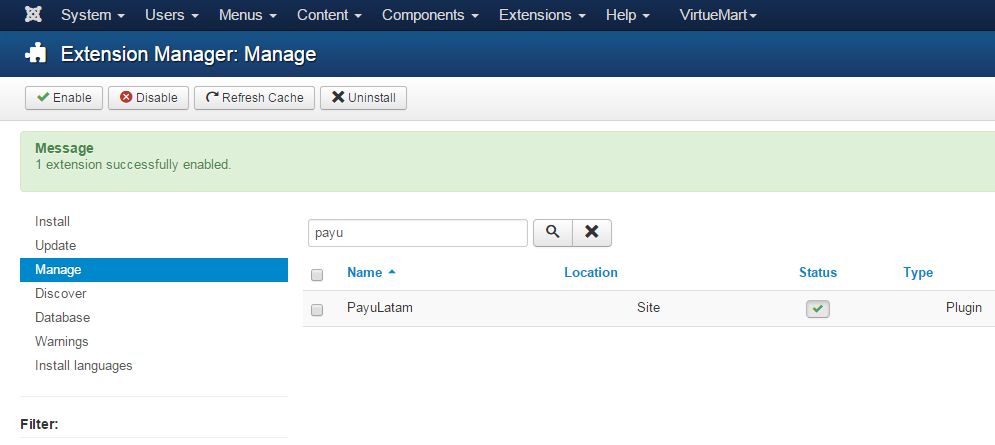
- In the left menu, click Manage. Find and enable the
PayuLatamplugin.
A message appears informing that you have enabled the plugin. Furthermore, the icon changes to a check mark.
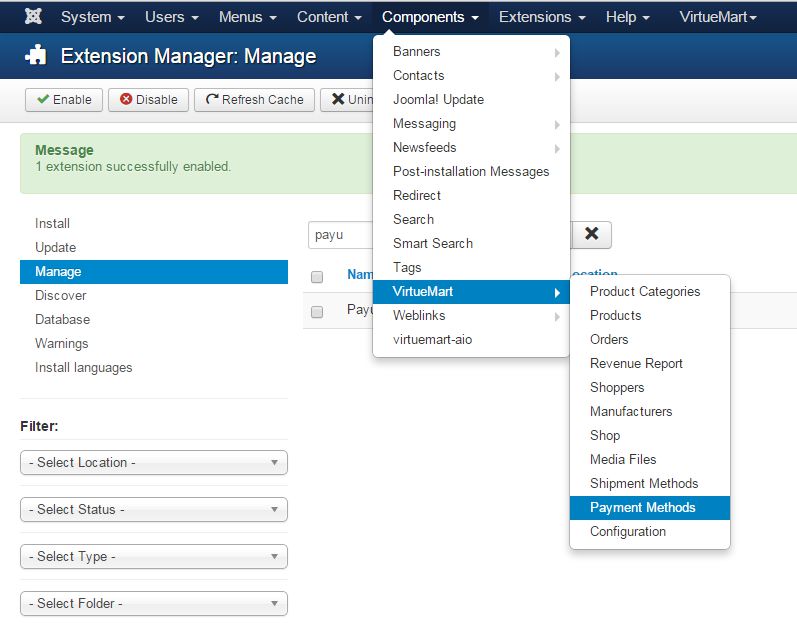
- Open the Components menu and expand the Virtuemart option. Then, select Payment Methods.
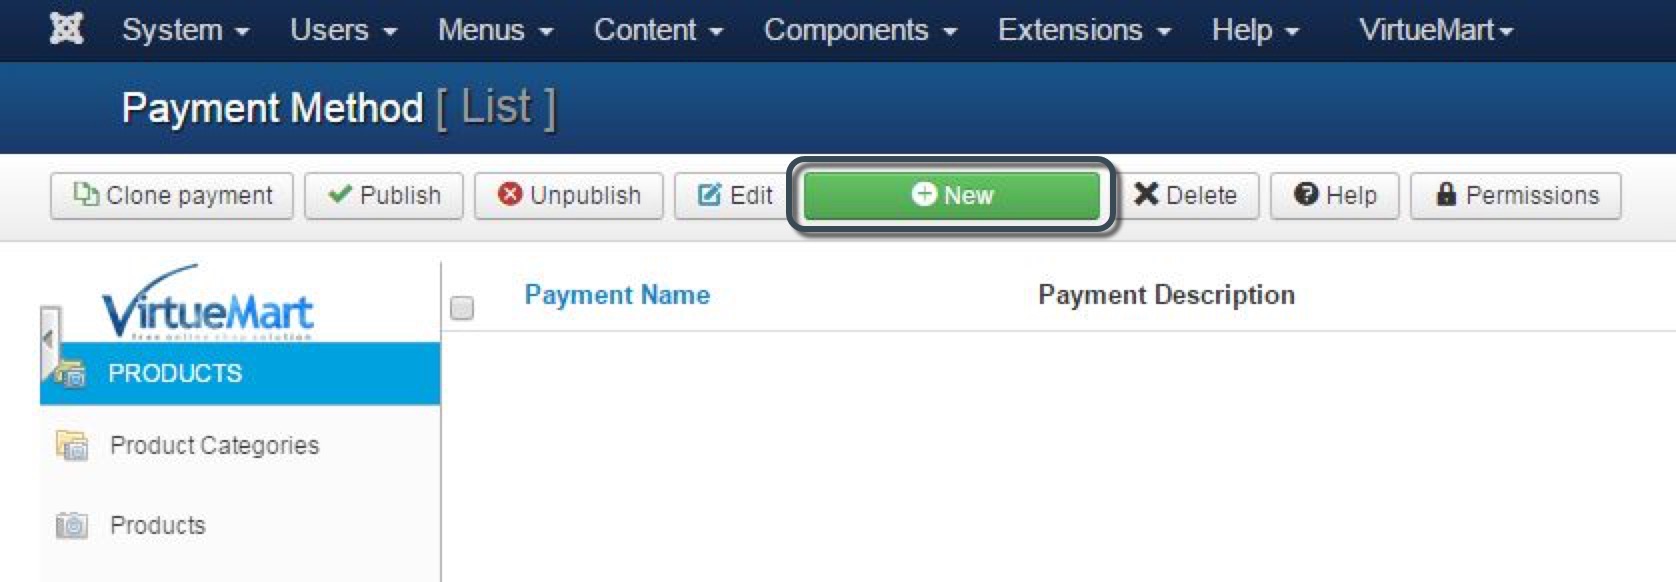
- In the opened window, click New to create a payment method using the
PayuLatamplugin.
- In the Payment Method Information tab, set Payulatam as Payment Name and select
PayuLatamin the Payment Method field.
- Go to the Configuration tab and provide the information of your account and your API key.
Furthermore, provide the connection URL to the gateway and the configuration variables explained in the Configuration variables section.
The URLs for test and production environments are:
- Test:
https://sandbox.gateway.payulatam.com/ppp-web-gateway - Production:
https://gateway.payulatam.com/ppp-web-gateway/
- Finally, click Save or Save & Close button. At this point, your customers can pay with PayU Latam using the VirtueMart shopping cart.
Configuration variables
Regardless of the VirtueMart version you use, set and configure the following variables in your plugin:
| Field | Value |
|---|---|
| Logo | Logo displayed for the PayuLatam payment method. |
| Test URL | Gateway URL for test: https://sandbox.gateway.payulatam.com/ppp-web-gateway. |
| Production URL | Gateway URL for production: https://gateway.payulatam.com/ppp-web-gateway. |
| Test Mode | Select Yes if you want to make transactions in the test environment. When you enable this option, VirtueMart uses the URL configured in the Test URL variable |
| Merchant ID | ID of your commerce in PayU Latam. |
| Account ID | ID of the PayU account according to the country where you want to sell. |
| API Key | Unique key of your commerce, you can find this key in the PayU module. |
Section ORDER STATUS PARAMS
|
Defines the order state in VirtueMart according to the transaction state returned by PayU. We suggest keeping the default states; nevertheless, you can configure them according to your business needs. |
| Currency | Set USD. Also, you can configure the currency of the Account ID country. |
| Minimum Value / Maximum value | The total value of an order must be within this range to activate the PayuLatam payment method. |
| Tax | To use this option, configure the corresponding VirtueMart rule to the associated tax. For example, IVA for Colombia. |
Last modified
March 14, 2025:
Documentation updates (6c5b59812)